
Beyond Probiotics Part 3: Bringing Fermentation into Your Kitchen
Over the past two articles, we've followed a journey together, beginning with fermentation as one of humanity's oldest culinary traditions and the ways people across cultures learned to preserve food long before anyone knew microbes even existed (Beyond Probiotics Part 1: The Science and Tradition of Fermented Foods), and continuing inward, into the body, where another remarkable community of microorganisms quietly influences digestion, immunity, metabolism, and even the way our brains communicate with the rest of us (Beyond Probiotics Part 2: Inside the Gut - How Your Microbiome Shapes Your Health). Now it's time to return to where this story has always belonged: the kitchen.
For all of the exciting discoveries about the microbiome, fermentation remains, at its heart, a way of preparing food, a cooking technique that has nourished families for thousands of years, transforming humble ingredients into foods with extraordinary flavor, texture, and character. Long before anyone talked about probiotics or gut health, people fermented vegetables because it helped the harvest last through winter, cultured milk because it stayed fresh longer, baked sourdough because it made beautiful bread, and brewed fermented drinks because they tasted good. The health conversation happening today is certainly interesting, but it's only one chapter in a much longer story.
What makes fermentation so quietly compelling is that it allows us to slow down. Unlike so many of our recipes that promise dinner in thirty minutes, fermentation unfolds over days, sometimes weeks, inviting us to observe rather than control, to notice small changes each day, and to trust a process that has been working quietly for generations. Perhaps that's why so many people find fermentation surprisingly satisfying: you're not simply following a recipe, you're participating in a living process. And the wonderful thing is that getting started doesn't require expensive equipment or a degree in microbiology, since people have been fermenting food for thousands of years with little more than vegetables, salt, clean containers, and patience. Once you understand the basics, fermentation becomes far less mysterious than it first appears.
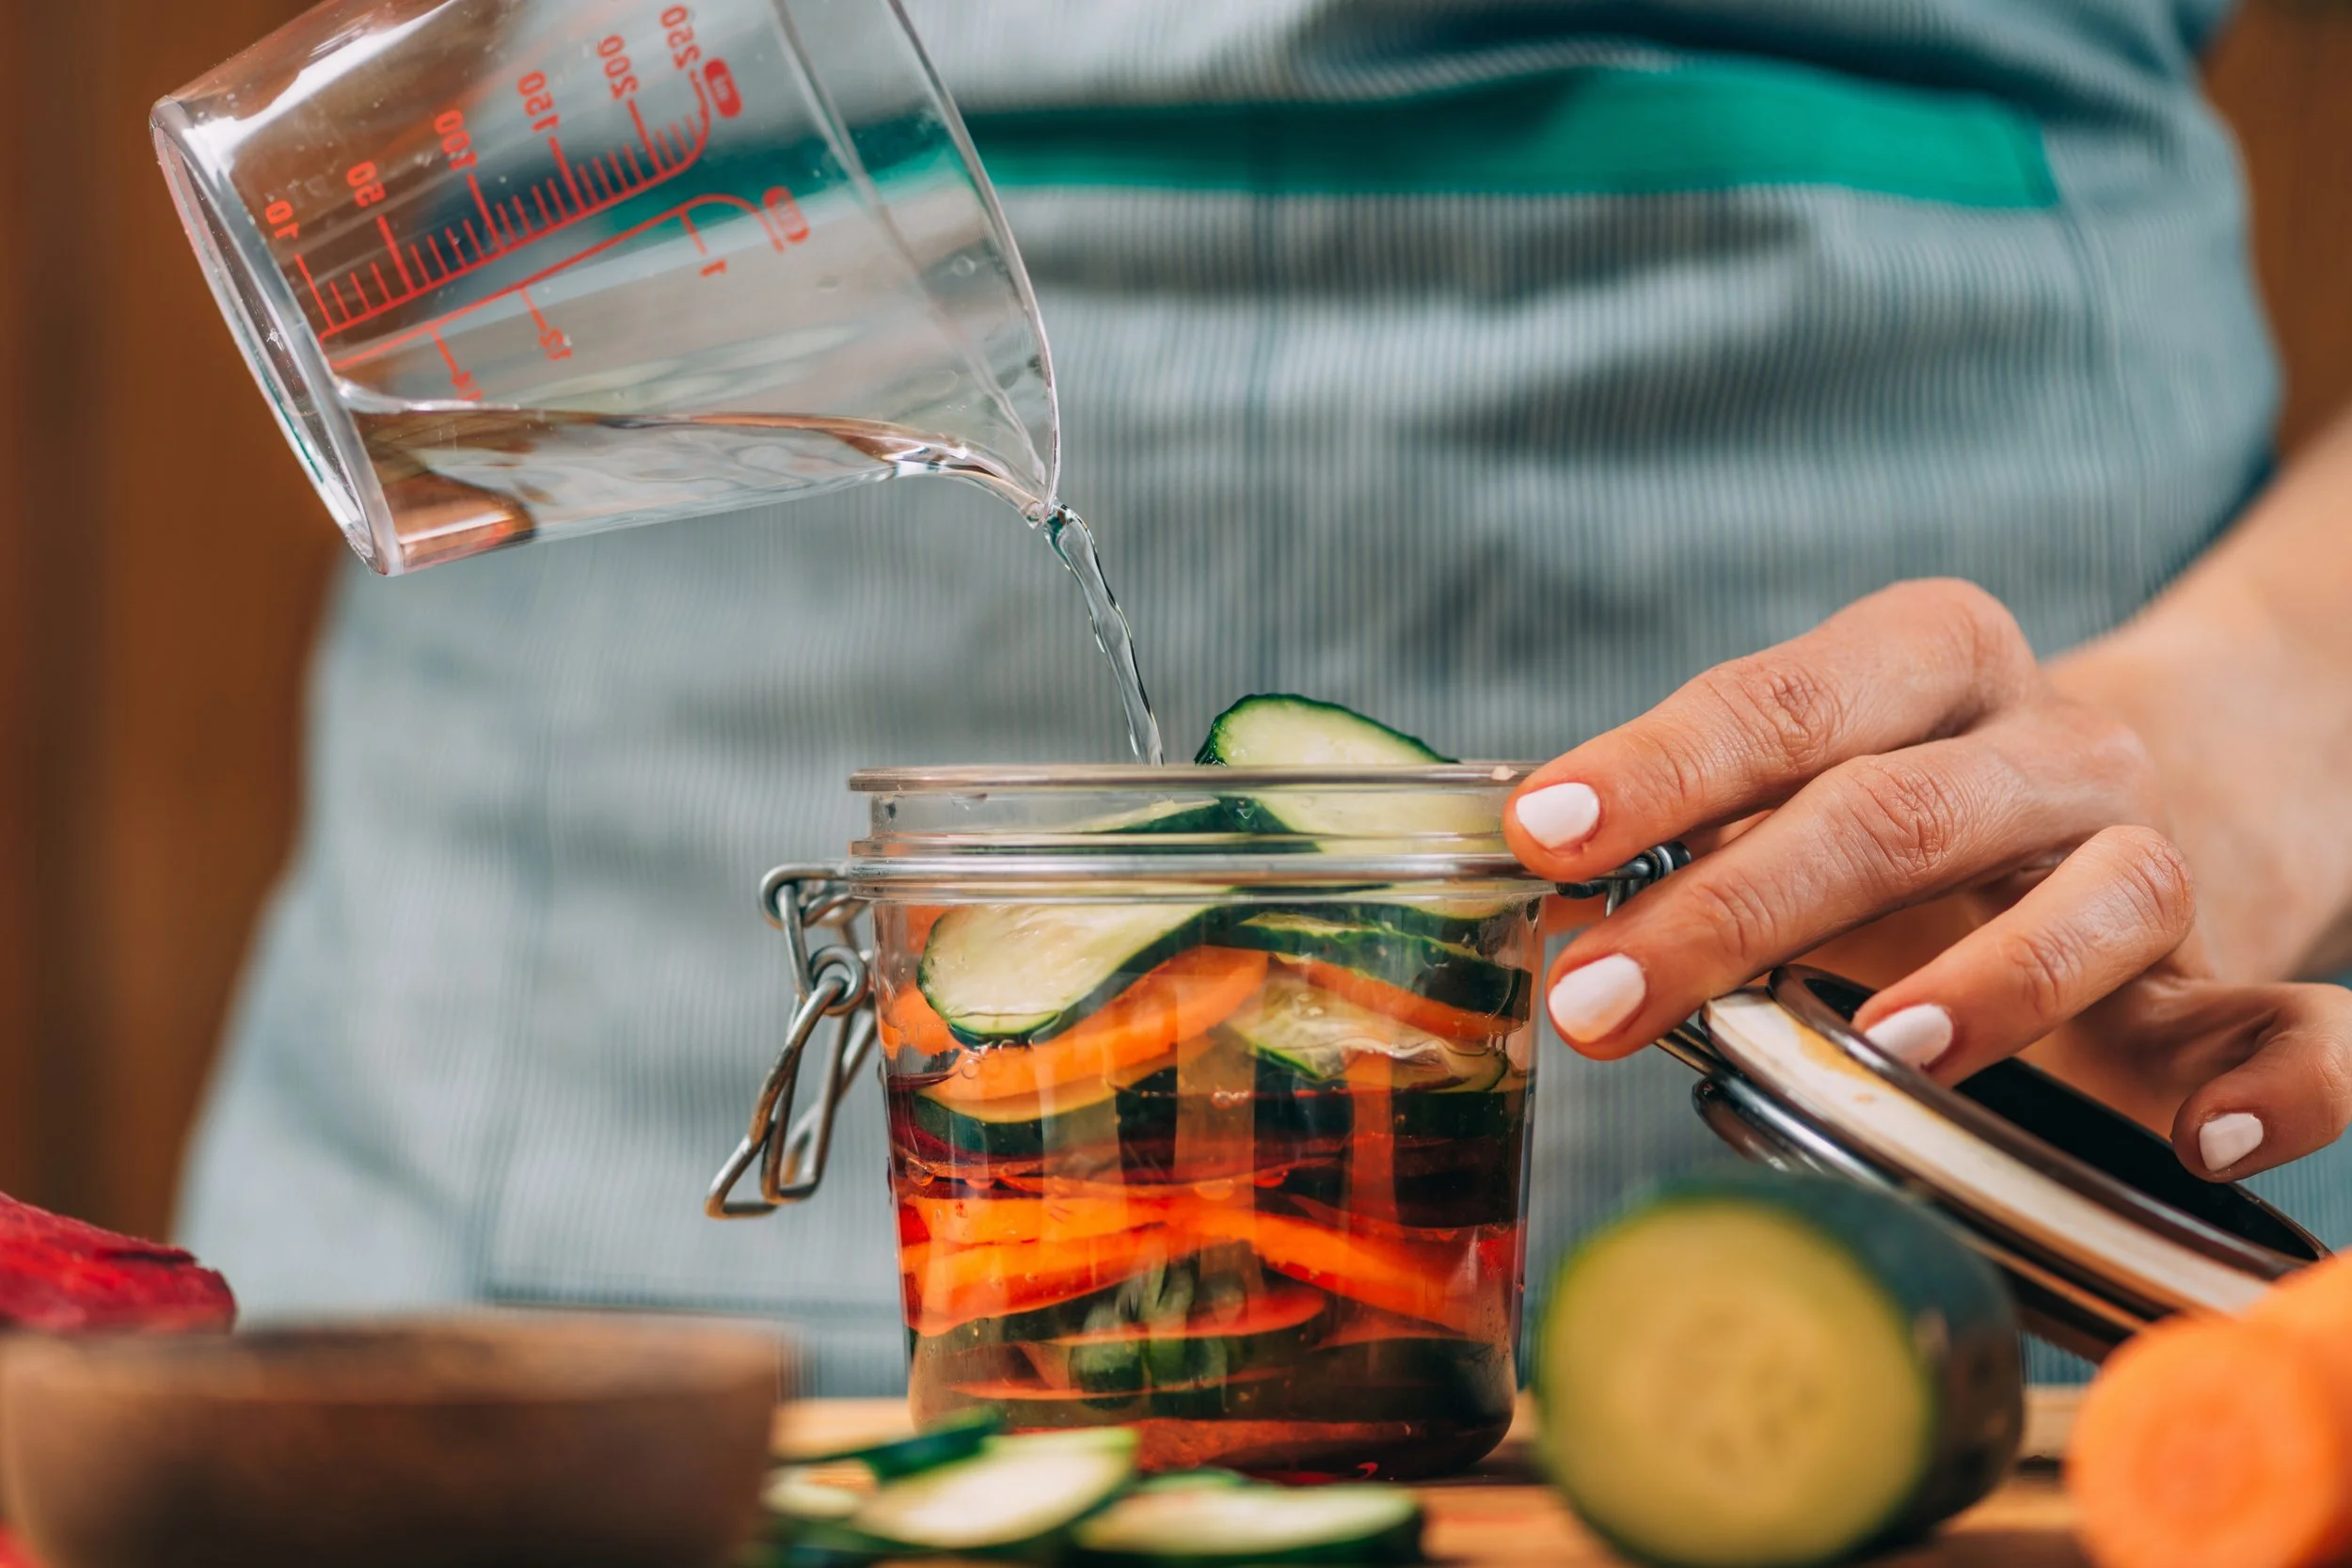
Adding saltwater brine.
What Fermentation Really Is
Fermentation may seem like something mysterious and complicated that is happening inside a sealed jar, but in reality it's one of the simplest and most natural processes in cooking. Fresh vegetables naturally carry communities of microorganisms on their surfaces, from the garden soil, the air, and on the vegetables themselves, that we never think about because they're simply part of nature. When we create the right conditions, something remarkable begins to happen: these naturally occurring microbes start consuming the sugars found in the vegetables. As they do, they produce acids that gradually change the environment inside the jar by lowering the pH and making it difficult for spoilage organisms to grow while allowing the beneficial microbes to continue thriving.
The vegetables themselves change too. Their flavors become brighter and more complex — sharp cabbage develops the pleasant tang that makes sauerkraut so distinctive, carrots become pleasantly sour while retaining much of their sweetness, and cucumbers transform into true fermented pickles with a depth of flavor that vinegar alone simply can't create. Texture shifts, aromas evolve, and even the colors soften slightly as the vegetables slowly become something entirely new. It's easy to think of fermentation as preserving vegetables, but that's only part of what's happening; fermentation transforms them, and that's one of the reasons cooks have valued it for centuries. It isn't simply a way to keep food from spoiling, it's a way to create flavors that don't exist in fresh ingredients alone.
Fermentation Is Everywhere
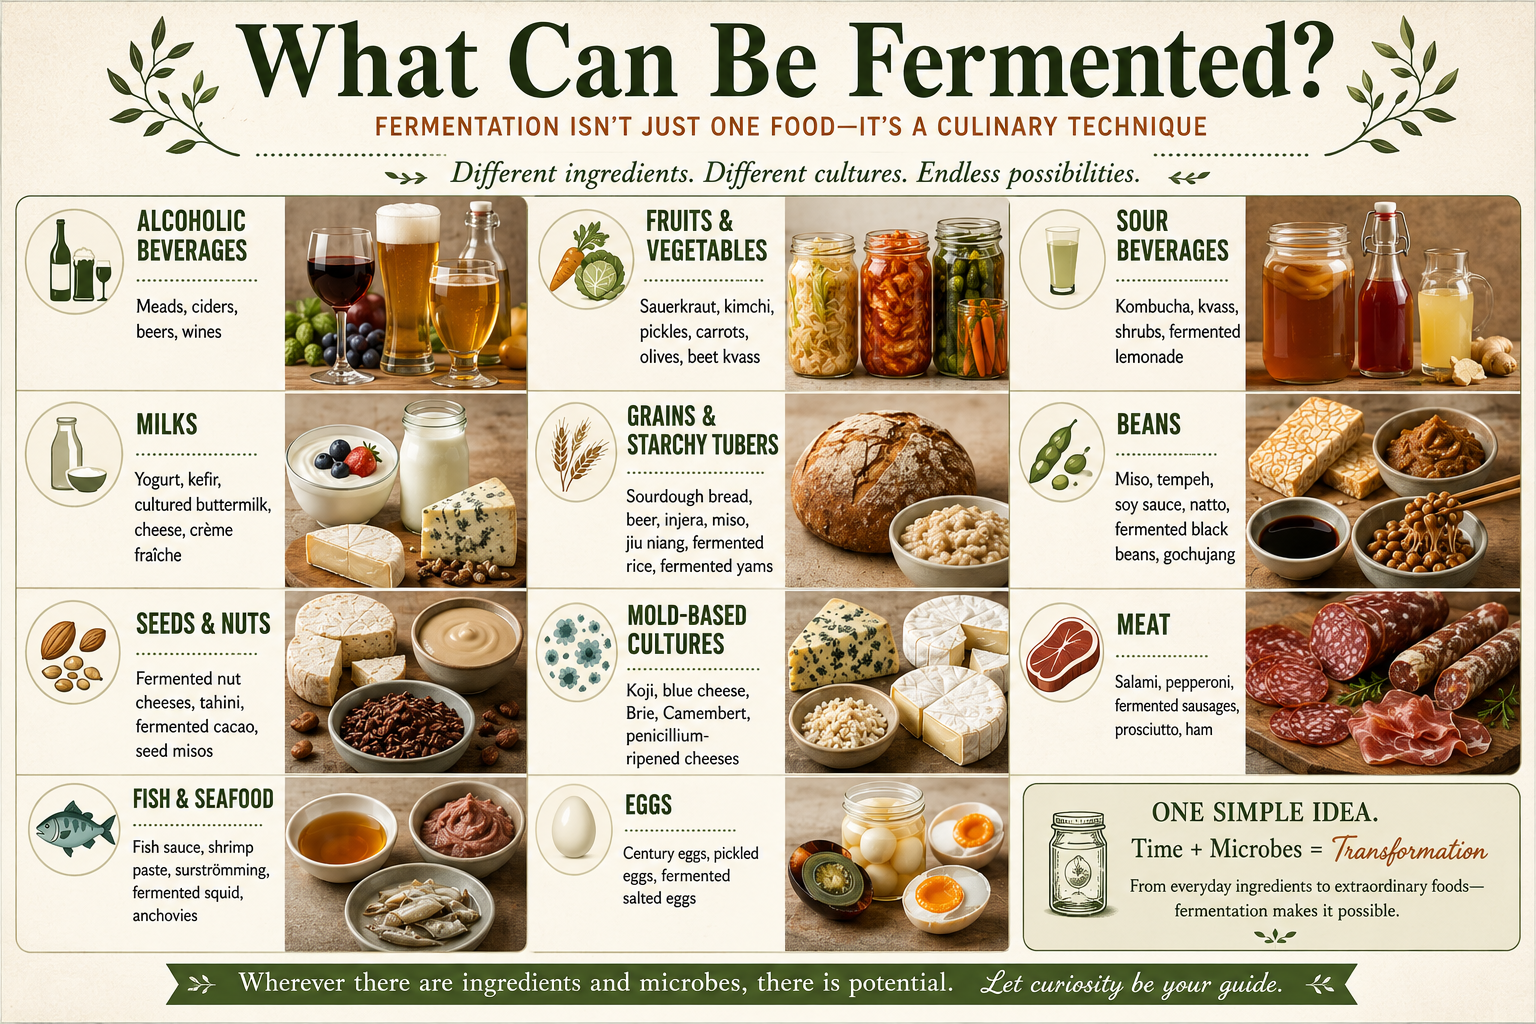
When asked to name a fermented food you might mention sauerkraut, kombucha, or perhaps yogurt, yet fermentation is much more than that. Once you begin noticing fermented foods, you'll find them almost everywhere in the kitchen and in cuisines around the world, some of them everyday staples and others deeply rooted in regional food traditions, together telling the story of one of humanity's oldest and most versatile cooking techniques.
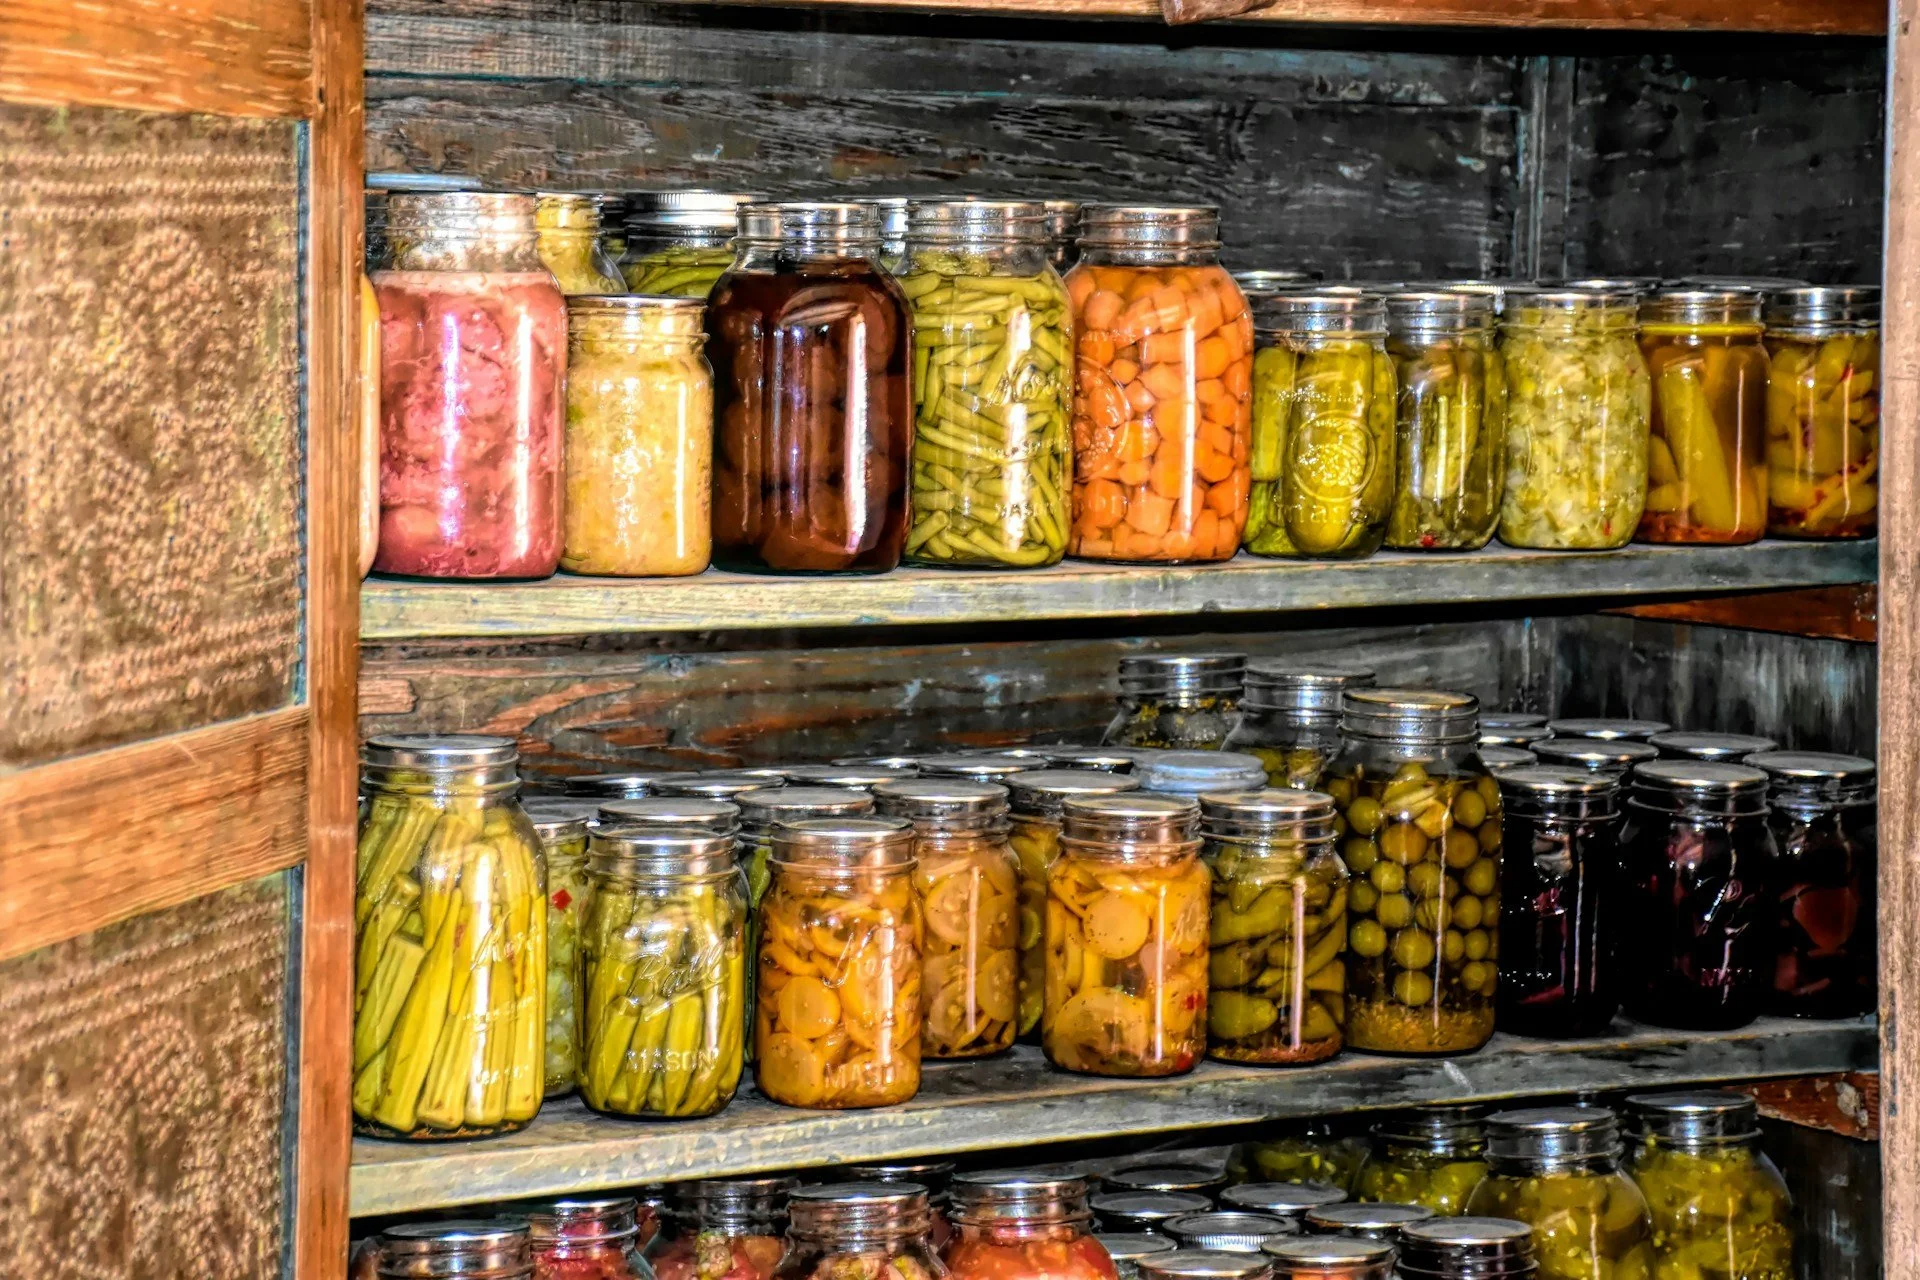
Grains, milks, beans, fruits, vegetables, honey, tea, nuts, seeds, fish, shellfish, meats, and even eggs have long histories of fermentation in cultures where preserving seasonal abundance was essential. It's an astonishing range of foods, and yet they all share the same basic idea: people discovered that by creating the right conditions, naturally occurring microorganisms could transform ordinary ingredients into foods with entirely new flavors, textures, aromas, and keeping qualities.
That realization changed the way we cooked, and it also means that if making fermented carrots or sauerkraut sparks your curiosity, you're only seeing the beginning of a much larger culinary world. Fermentation isn't a single recipe or even a single category of food — it's a collection of techniques that has shaped kitchens on every continent, offering endless opportunities to explore new flavors, traditions, and ways of cooking.
Wild Fermentation and Cultured Fermentation
As you begin exploring fermentation, you'll notice there are two basic approaches, both relying on microorganisms to do the work but arriving at that destination in slightly different ways.
Wild fermentation is where many people begin, and it's one of the most rewarding forms of fermentation because it asks us to trust nature. The vegetables already carry everything they need: when cabbage is mixed with the proper amount of salt, or carrots are submerged beneath a salty brine, the naturally occurring microorganisms begin sorting themselves out, with some flourishing briefly before giving way to others, until eventually lactic acid bacteria become the dominant community, producing the acids that preserve the vegetables and create their familiar tangy flavor. Nothing has been added except salt — no starter culture, no packet of bacteria, no special ingredients, since every head of cabbage, bunch of carrots, radishes, green beans, or beets carries with it tiny organisms that have been quietly waiting for the right conditions to begin their work. Our role isn't to introduce them, it's simply to create an environment where they can thrive, which is why sauerkraut, kimchi, fermented carrots, dilly beans, beet kvass, and naturally fermented pickles all fall into the category of wild ferments guided by the microorganisms already present on the food itself. Nature supplies the culture; we simply provide the conditions.
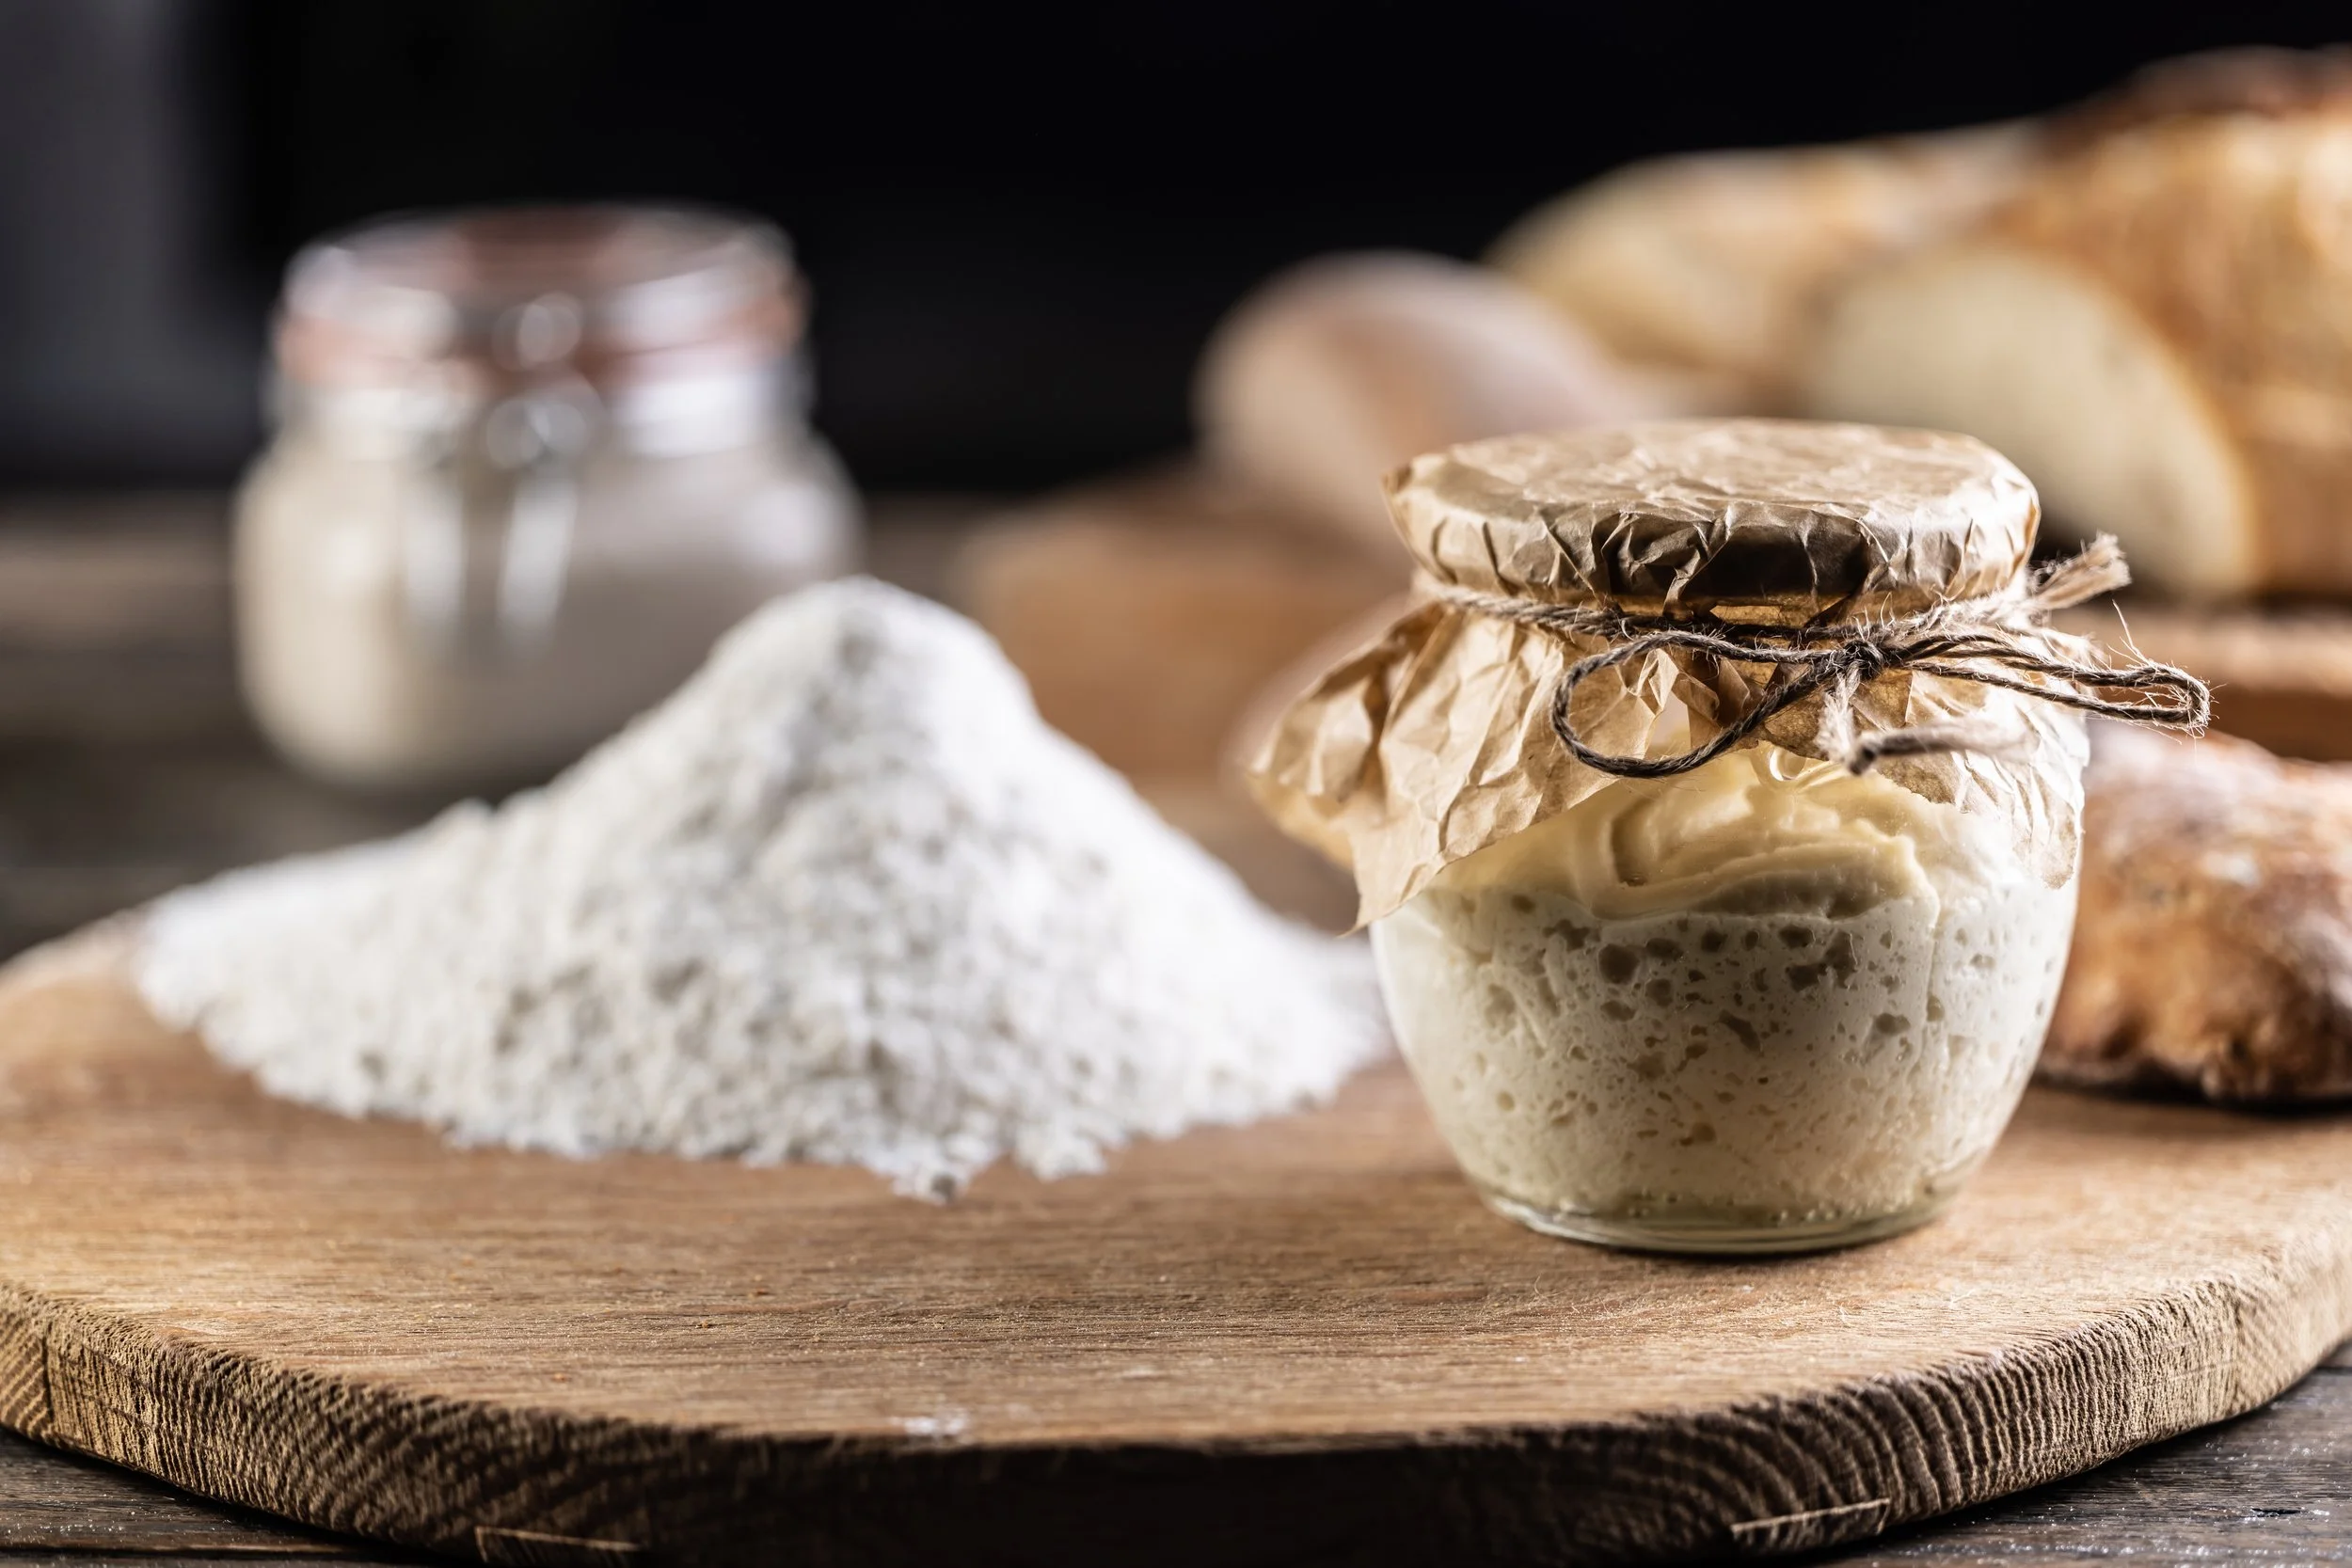
Sourdough starter.
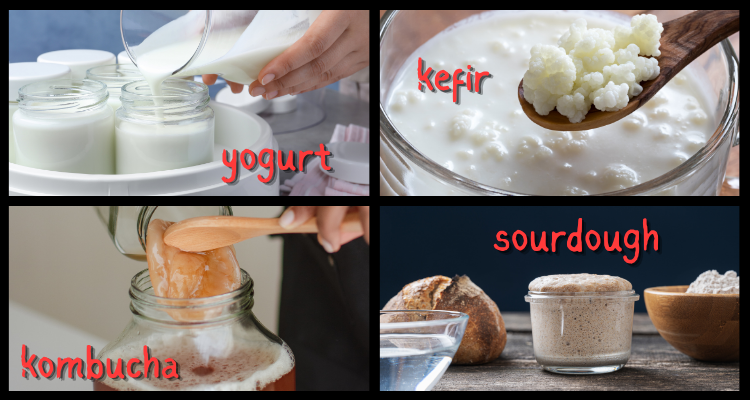
Cultured fermentation begins a little differently. Instead of relying on the microorganisms naturally present in the ingredients, we introduce a carefully maintained starter culture containing its own balanced community of bacteria, yeasts, or both, which immediately begins fermenting the food — the approach used for yogurt, milk kefir, kombucha, and sourdough. Each starter has its own personality: a sourdough starter contains a unique community of wild yeasts and bacteria that has developed over time, a kombucha SCOBY is a living culture of bacteria and yeast working together to transform sweet tea, and milk kefir grains look almost like small cauliflower florets, yet inside them lives a remarkably diverse ecosystem capable of turning ordinary milk into a creamy, tangy cultured beverage. Unlike wild vegetable fermentation, where nature provides the microorganisms already living on the food, cultured fermentation begins with a community that has been intentionally nurtured and passed from one kitchen to another, sometimes for generations.
Neither method is better than the other. They're simply different expressions of the same remarkable partnership between people and microbes, and once you understand that partnership, fermentation begins to feel much less intimidating. You're not trying to make something happen — you're creating the conditions that allow nature to do what it has been doing for thousands of years.
Meet the Microbes
Fermentation is really a team effort, with different microorganisms arriving at different times, each playing its own role in transforming fresh vegetables into something entirely new. You don't need to memorize their scientific names or understand every stage of the process to become a successful fermenter, but having a basic idea of who's doing what makes the whole experience a little less mysterious.
The lactic acid bacteria are the stars of vegetable fermentation. Naturally present on fresh vegetables and waiting for the right conditions, they begin consuming the natural sugars in the vegetables once salt or brine is introduced, producing lactic acid as they go. That lactic acid gives fermented vegetables their pleasant tang, but it also gradually lowers the pH inside the jar, creating an environment where spoilage organisms can no longer thrive. When people describe fermented vegetables as "lacto-fermented," they're referring to lactic acid, not lactose, an important distinction since there's no dairy involved in lacto-fermented vegetables; the name simply comes from the type of acid the bacteria produce.
The wild yeasts are also part of the fermentation community, often beginning their work before the lactic acid bacteria become dominant, producing carbon dioxide and contributing to the subtle changes in aroma and flavor that develop over time. If you've ever opened a jar of fermenting vegetables and heard a gentle hiss or noticed tiny bubbles clinging to the vegetables, you've seen some of their work. Yeasts are perhaps best known for making bread rise and turning grape juice into wine, but they quietly participate in many other fermented foods as well.
The acetic acid bacteria are less important in vegetable fermentation but play a leading role in foods like kombucha and vinegar, converting alcohol into acetic acid and giving vinegar its familiar sharp flavor while contributing to the bright, refreshing character of kombucha. They're another reminder that fermentation isn't one process but a collection of natural transformations carried out by different microbial communities, each performing its part briefly before others take over, together creating something far more interesting than any one could accomplish alone.
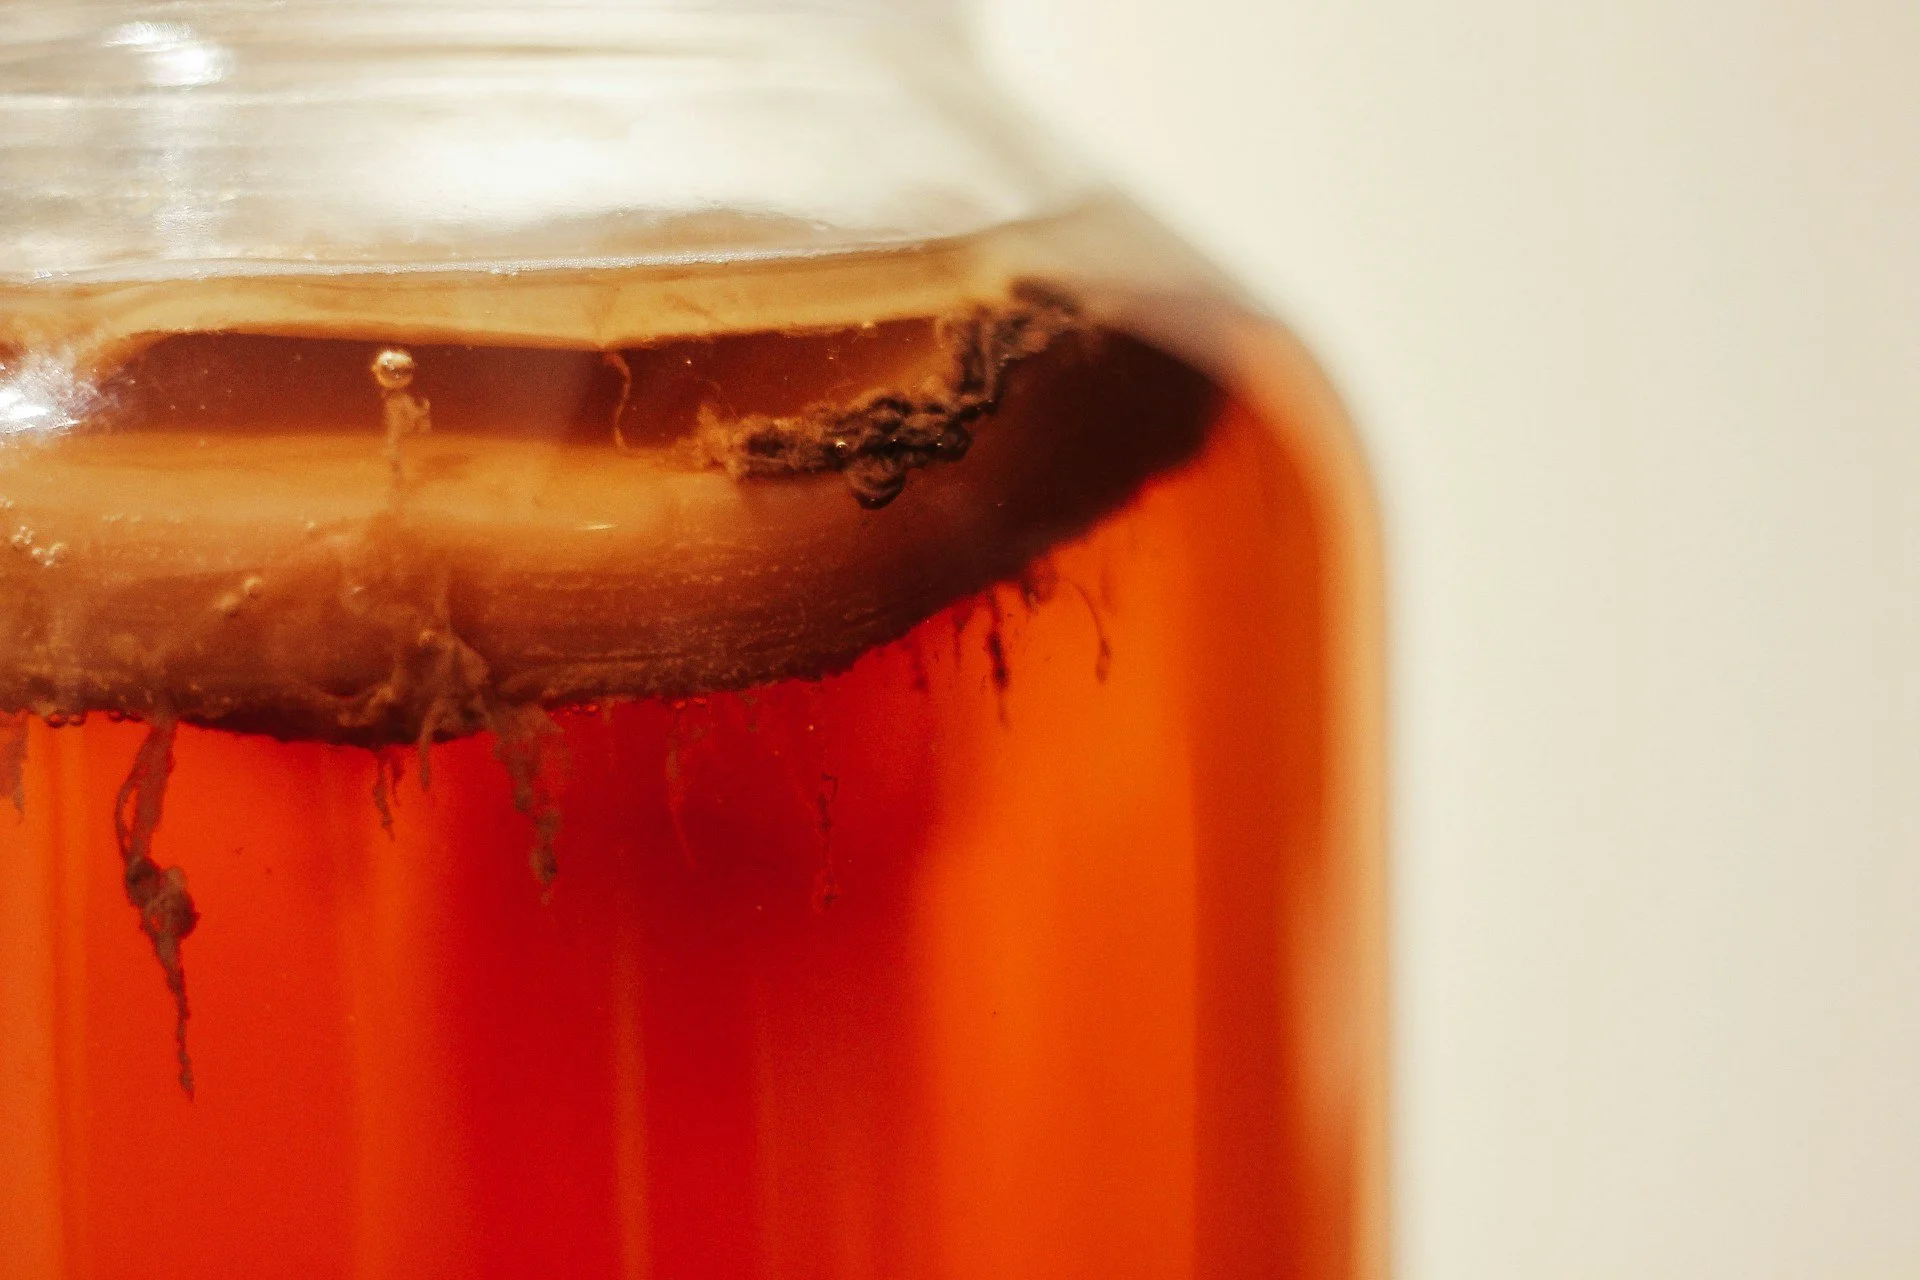
Kombucha SCOBY - symbiotic culture of bacteria and yeast.
Why Salt Matters
If there is one ingredient that surprises new fermenters, it's salt. It's not there to simply season the vegetables, although it does, its real job is creating an environment where the right microorganisms can flourish while discouraging the ones we don't want. Whether it’s drawing moisture from vegetable cells or creating a ready made saltwater brine, salt gives the beneficial lactic acid bacteria a head start while slowing many spoilage organisms that prefer different conditions.
The amount matters a great deal. Too little, and undesirable microbes have a better chance of multiplying before the lactic acid bacteria become established; too much, and even the beneficial bacteria slow down, making fermentation take much longer than necessary. That's why experienced fermenters almost always recommend weighing your vegetables rather than measuring them by volume, since a digital kitchen scale takes the guesswork out of the process and allows you to calculate the proper percentage of salt with remarkable consistency. One of the biggest lessons fermentation teaches is that cooking isn't always about precision for its own sake — it's about understanding why each ingredient is there, and once you understand the role salt plays, following a fermentation recipe begins to make much more sense.
There's one more job the brine performs: it keeps the vegetables below the surface, since exposure to air encourages molds and other unwanted microorganisms, while beneath the brine the environment becomes increasingly hospitable to the beneficial bacteria we want and far less welcoming to those we don't. For that reason, one of the simplest habits you'll develop as a fermenter is making sure everything stays submerged, which doesn't require constant attention, just a weight, a cabbage leaf, or another simple way of holding the vegetables below the surface of the brine while nature quietly goes about its work.
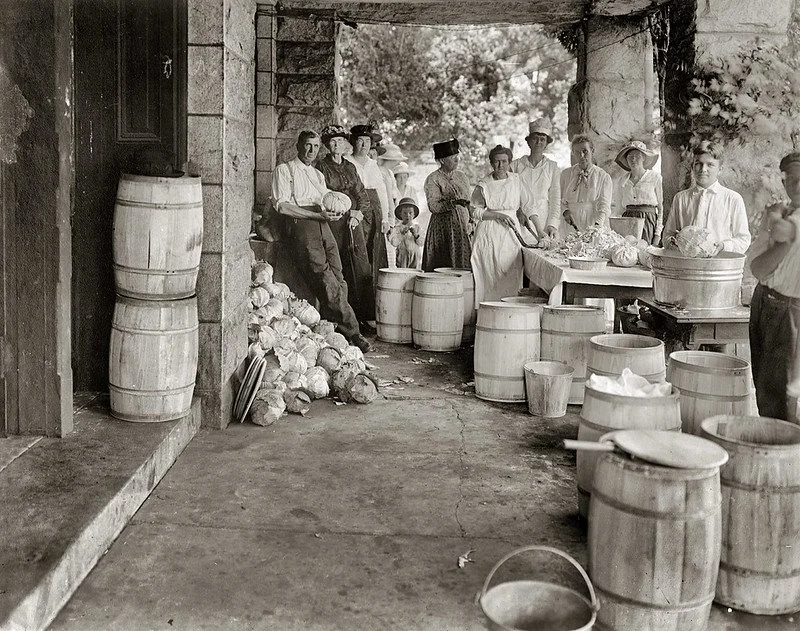
Making “Liberty cabbage” (sauerkraut) around 1918 in Washington D.C.
A Beginner's Fermentation Toolkit
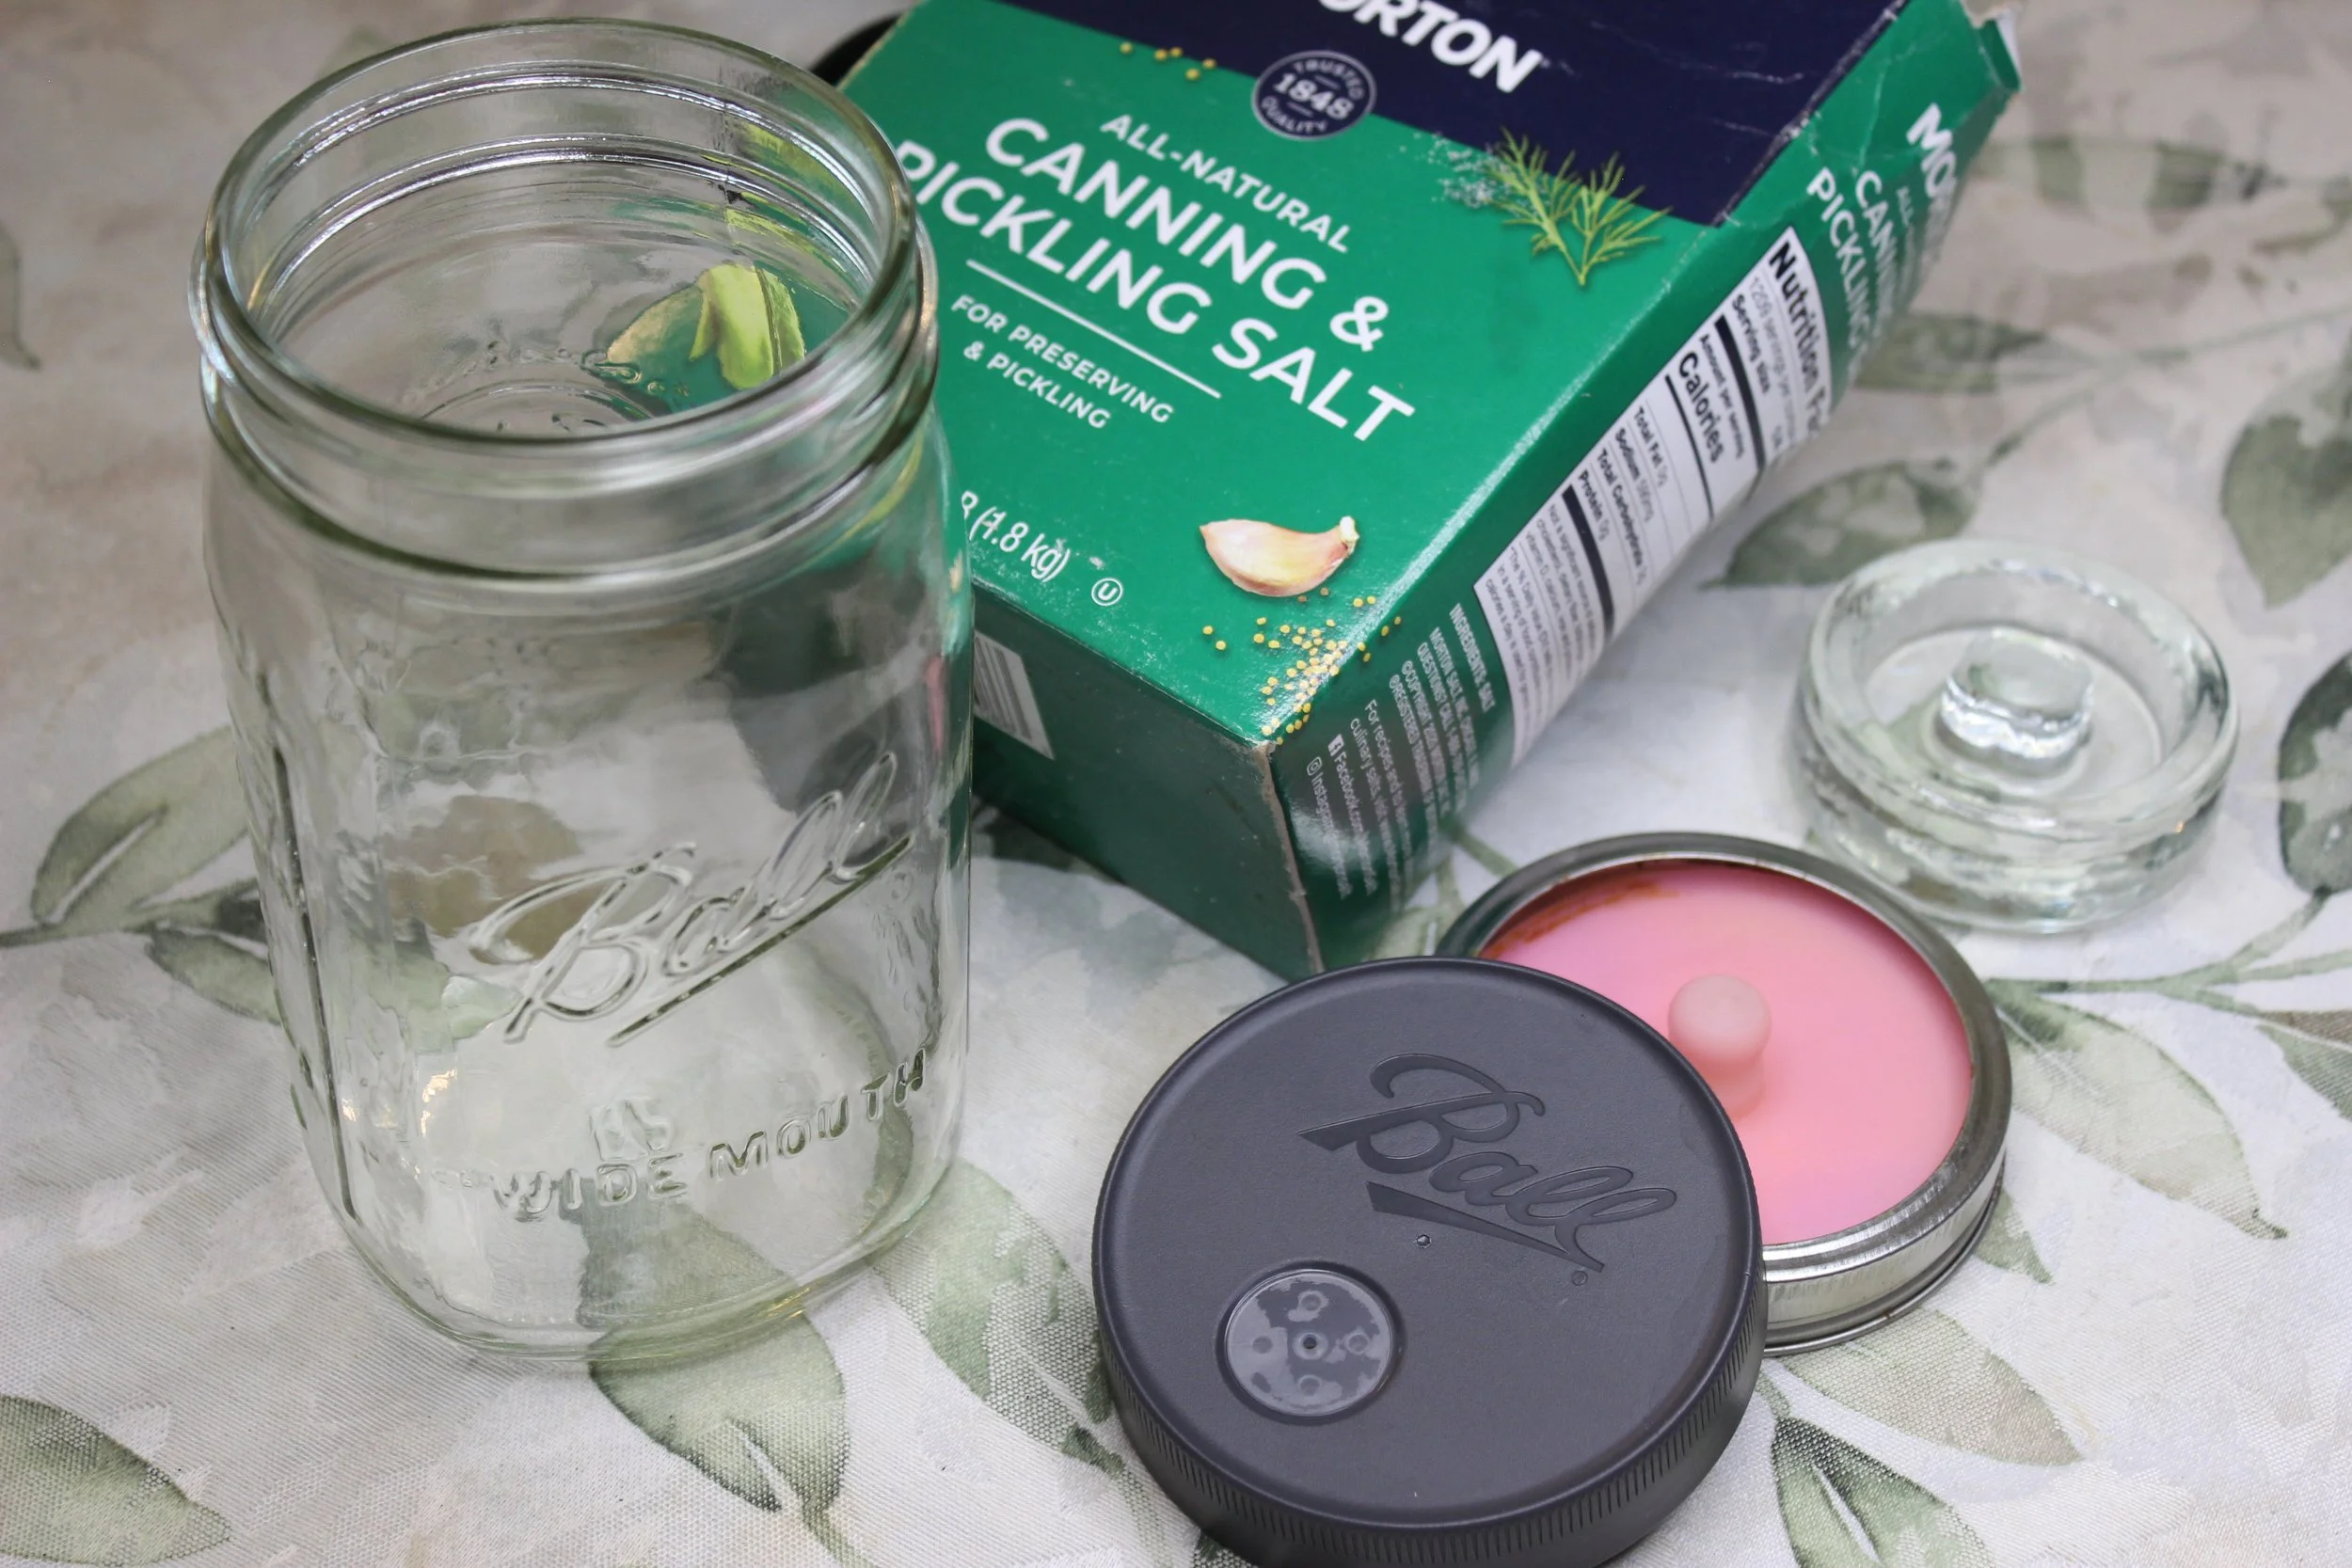
Getting started with fermentation requires a few simple kitchen basics. A one-quart wide-mouth glass jar is an ideal place to start, inexpensive, easy to clean, and just the right size for experimenting with small batches, with the added benefit that glass lets you watch the fermentation unfold as it happens. A digital kitchen scale is perhaps the one tool most worth purchasing, since vegetables vary in size and density and weighing them gives far more reliable results than measuring by cups or estimating, while also making the proper amount of salt simple and repeatable.
Good salt matters too — choose one that is non-iodized and without anti-caking agents or additives. Fine sea salt, kosher salt, or pickling salt all work well as the goal is simply something that dissolves cleanly. A fermentation weight helps keep vegetables below the brine, though many people begin by tucking a folded cabbage leaf over the vegetables before placing a small jar filled with water on top, and any standard canning lid, airlock lid, or similar covering will do, since fermentation has been happening successfully for thousands of years with very simple equipment.
As your interest grows, you may decide to invest in crocks or larger vessels, fermentation weights, and airlock lids, but the lack of specialized tools shouldn't keep you from getting started — the best fermentation equipment is often the equipment you already have.
The Basic Vegetable Fermentation Process
Once you understand the basic process, you can ferment almost any vegetable with confidence. You're not memorizing dozens of recipes, you're learning a method, and whether you're making sauerkraut, fermented carrots, cauliflower, radishes, green beans, or cucumbers, the same principles apply even as the herbs and spices change.
Fermentation begins long before the vegetables go into the jar, with fresh, firm vegetables free from mold or decay — this isn't the time to use anything already beginning to soften, since the quality of the finished ferment can only be as good as the ingredients you begin with. Whenever possible, vegetables in season are often at their best flavor, and using them connects fermentation to one of its oldest purposes: preserving the abundance of the harvest to enjoy in the weeks and months ahead.
From there, preparation depends on what you're making — cabbage shredded, carrots left whole or cut into sticks or coins, radishes halved, green beans left whole, cauliflower broken into florets — and there isn't a single right way, so let how you plan to enjoy the finished ferment guide how you prepare the vegetables.
Fermentation truly begins by creating the environment that allows the beneficial lactic acid bacteria to flourish. For vegetables like cabbage, radishes, and turnips that naturally release a lot of liquid, you'll mix them with salt and allow them to rest as the salt draws moisture from the vegetables, creating their own brine, while for firmer vegetables like carrots, cucumbers, green beans, and cauliflower, you'll usually prepare a saltwater brine and pour it over the vegetables after they're packed into the jar.
You’ll want to pack the vegetables snugly, but not so tightly that the brine can't circulate between them. Every piece of vegetable should remain beneath the surface of the brine throughout fermentation, since the beneficial bacteria we're encouraging prefer an oxygen-free environment while molds thrive where vegetables are exposed to air. This is easily accomplished with a fermentation weight or another food-safe method. One of the small pleasures of fermentation is arranging the food in the jars, with bright orange carrots, sprigs of dill, garlic cloves, peppercorns, and mustard seeds becoming almost as beautiful as they are delicious, a reminder that preserving food can be practical and creative at the same time.
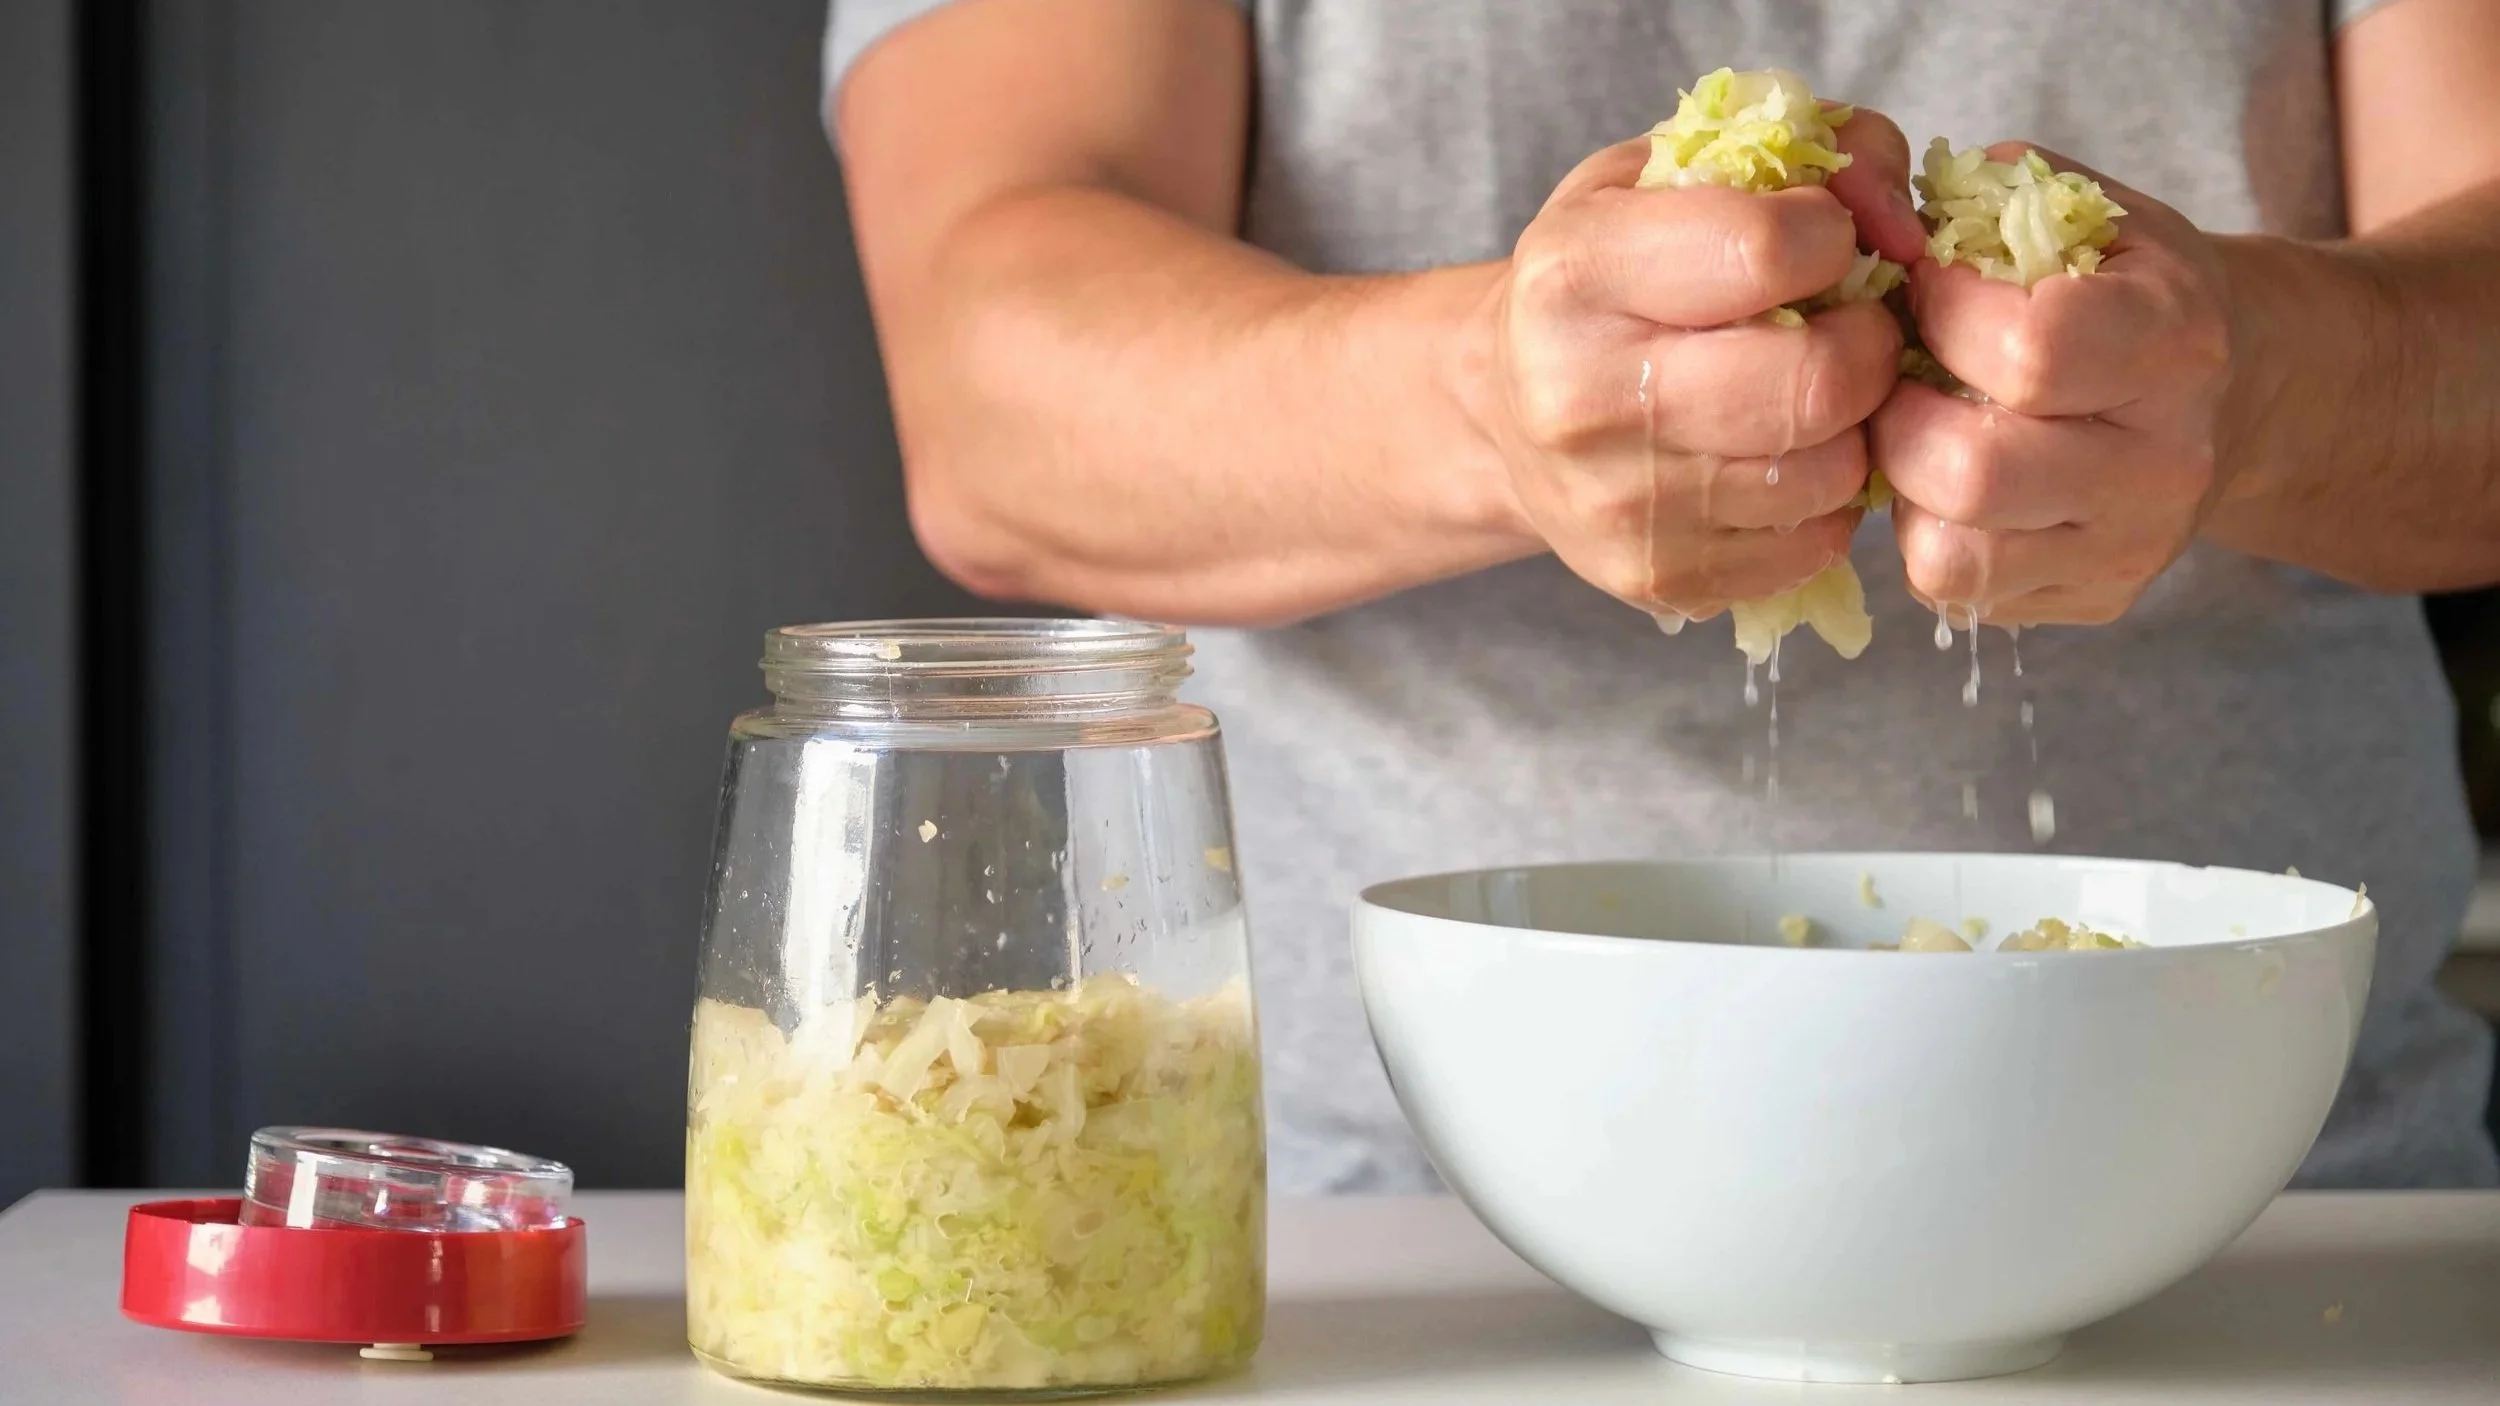
Packing salted cabbage for sauerkraut.
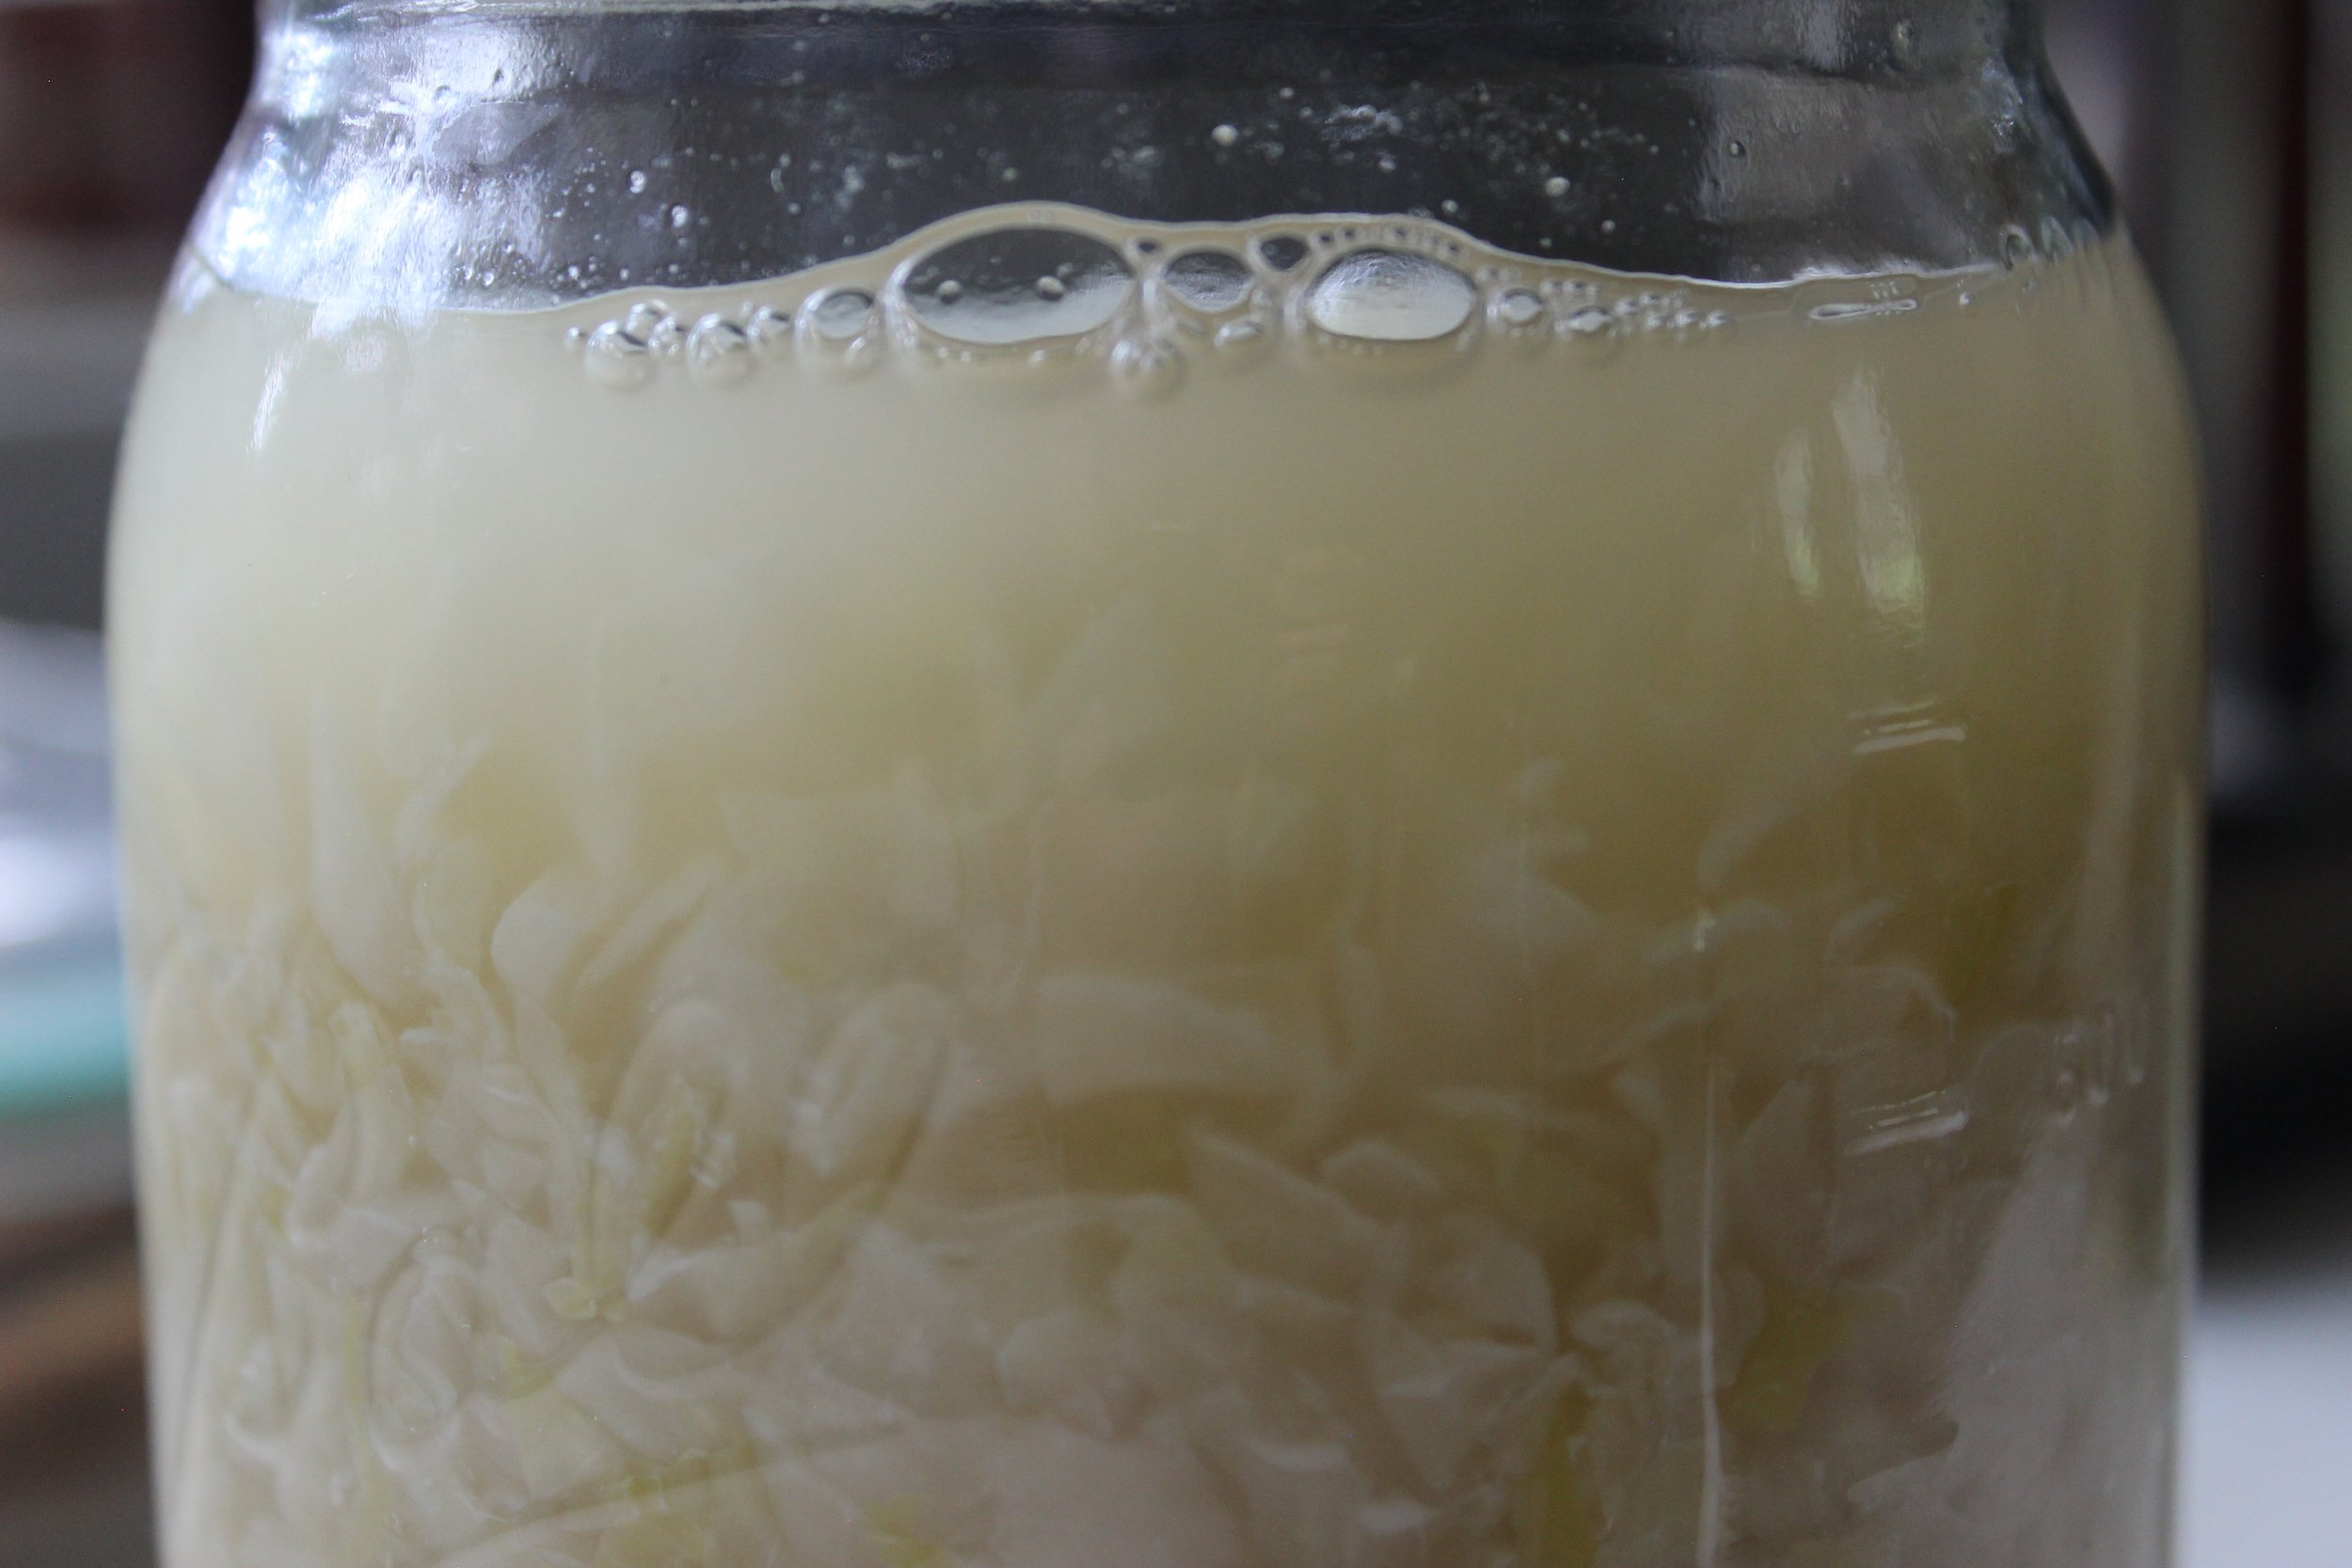
Then we wait. Over the next several days, small changes appear — tiny bubbles along the sides of the jar, brine that turns cloudy, an aroma that slowly shifts from fresh vegetables to a pleasantly tangy scent. None of these happen all at once, each unfolding instead in its own time, much like a garden growing or bread dough rising.
One of the best parts of home fermentation is that you decide when it's finished: with a mild tang after only a few days or the deeper flavor that develops after two or three weeks. There isn't a universal finish line — your taste becomes the guide, and every batch teaches you something about your own preferences, each jar becoming a little conversation between you, your ingredients, and the passage of time. Once the vegetables taste the way you like them, transferring the jar to the refrigerator slows fermentation dramatically, helping preserve both flavor and texture while giving you plenty of time to enjoy what you've made.
Don't Be Afraid of the Bubbles
Worrying that something might go wrong is natural when learning to ferment. If you've never fermented vegetables before, opening a jar to find cloudy brine or tiny bubbles can feel a little unsettling, since we're used to thinking that changes in food are usually signs of spoilage. Fermentation asks us to see those changes differently: cloudy brine is completely normal and often a sign that the lactic acid bacteria are actively doing their work, while tiny bubbles are simply evidence that fermentation is underway. Even a thin white film known as kahm yeast can occasionally appear on the surface, and while it isn't particularly attractive and may affect flavor if left alone, it isn't mold and isn't generally considered harmful, so simply remove it if it develops and continue checking your ferment. Mold, however, is different — fuzzy patches that are blue, green, black, pink, or orange are signs that the ferment ought to be discarded, though true mold is uncommon when vegetables remain fully submerged beneath the brine and clean equipment is used.
As with many cooking skills, confidence grows through experience as we learn to pay attention - noticing how the vegetables change from one day to the next and recognizing the pleasant aroma of a healthy ferment. Before long, the bubbling jars on your counter begin to feel less like a science experiment and more like another enjoyable part of cooking.
Good food doesn't always come from adding more ingredients — sometimes it comes from giving simple ingredients the time they need to become something new. In a world that often encourages us to hurry, fermentation quietly teaches the opposite: slow down, observe, taste, trust the process. Those lessons are just as valuable in the kitchen as the jar of sauerkraut waiting on the counter.
Beyond Vegetables: Other Easy Ferments to Explore
Once you've made your first batch of fermented vegetables, it's hard not to wonder what else can be fermented, and the answer is quite a lot. Some ferments rely on the naturally occurring microorganisms already present on the food, while others begin with a starter culture carefully maintained and shared from one kitchen to another, and both approaches are wonderfully rewarding, each with its own unique rhythm.
Homemade yogurt is one of the simplest cultured dairy products to make, since a small amount of yogurt containing live cultures is added to warm milk and left undisturbed while the cultures gently thicken and transform it into something creamy. It's an approachable first cultured ferment because the ingredients are familiar and the process is forgiving. If yogurt is a quiet ferment, milk kefir is a lively one — tiny kefir grains, living communities of bacteria and yeast, transform milk into a tangy cultured beverage in about twenty-four hours, and once strained, the grains are ready to begin again with a fresh batch, making milk kefir one of the easiest ferments to maintain as part of a weekly kitchen routine.
Kombucha begins with sweetened tea and a SCOBY, a symbiotic culture of bacteria and yeast, which over the course of a week or two transforms the tea into a lightly tart, refreshing beverage, with a second fermentation, often involving fruit or herbs, creating the natural fizz that makes homemade kombucha so enjoyable. Like vegetable fermentation, it rewards curiosity, since small changes in tea, temperature, or flavorings can produce surprisingly different results. And there is something almost magical about flour, water, and time: a sourdough starter is a living culture of wild yeasts and bacteria that can be maintained for years, even decades, with regular feeding, becoming the foundation for beautiful loaves of bread, pancakes, crackers, pizza dough, muffins, and countless other baked goods. Many people begin keeping a sourdough starter because they want to bake bread, and continue because they enjoy caring for something alive that improves with time.
Whichever ferment captures your interest first, you don't have to learn them all at once. Choose one, become comfortable with it, and enjoy the process — the confidence you gain from one ferment naturally carries into the next.
Ready to Start Fermenting?
If this article has sparked your curiosity, there's no need to try everything at once. Pick one project that sounds interesting, whether it's a jar of fermented carrots sitting on your kitchen counter, a batch of creamy homemade yogurt, or your first loaf of sourdough bread. Every ferment teaches you something new, and every batch builds your confidence, since the goal isn't to become an expert overnight, it's simply to begin.
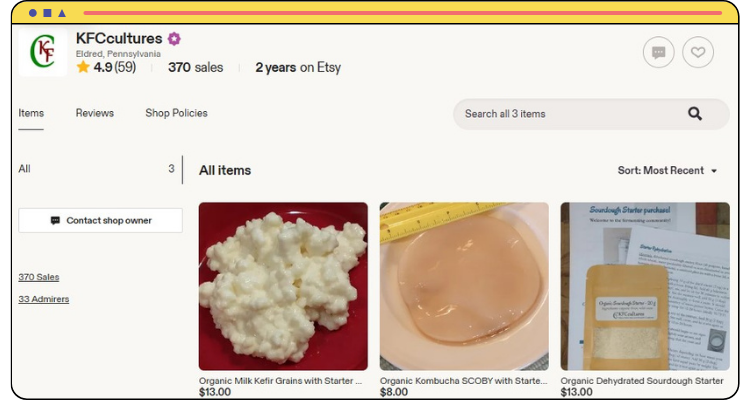
If you're ready to explore cultured fermentation, starter cultures like milk kefir grains, kombucha SCOBYs, and sourdough starters are often easiest to come by through a friend who already keeps one, a local fermentation or homesteading group, or a small trusted supplier (buy them here!). A healthy culture can be shared generously and will go on producing batch after batch with just a little care. If yogurt is your first project, no special culture is even needed — simply use a plain yogurt with live active cultures from your local grocer as your starter, and you may be surprised how easy it is to make your own. Whether you begin with vegetables or a starter culture, every experienced fermenter was once making their very first batch.
Conclusion
Three articles ago, we began with a simple question: what makes fermented foods so special? Along the way, we discovered that fermentation is one of the oldest cooking techniques in the world, explored how people preserved food long before refrigeration, and traced how those traditions gave rise to some of the most beloved foods in nearly every culture. Then we turned our attention inward, learning that another community of microbes has been with us all along, quietly participating in many of the processes that help keep us functioning well. Now we've come back to the kitchen, and somehow, that feels like exactly where this story belongs.
Fermentation has never really been about chasing the latest health trend - it's about taking ordinary ingredients and, with a little salt, a little time, and a little patience, allowing them to become something extraordinary. The ingredients are familiar, but the finished food tells an entirely different story, and perhaps that's one of the reasons fermentation has endured for thousands of years: it reminds us that some of the best things in the kitchen can't be rushed, developing gradually, often quietly, changing a little each day until one morning we open the jar, take a taste, and realize something wonderful has happened.
You don't need a science background, a perfectly organized kitchen, or a shelf of specialized equipment to begin. What you need is a vegetable, a little salt, and the willingness to let nature take it from there. Curiosity leads to a first jar. A first jar leads to confidence. Confidence leads to a kitchen where fermentation feels like just another way of cooking — not something reserved for scientists, professional chefs, or people who call themselves fermenters, but another way of preserving the harvest, another way of creating delicious food, another opportunity to slow down long enough to participate in one of humanity's oldest culinary traditions.
So choose a vegetable. Fill a jar. Add a little salt. Then let nature take it from there — you might be surprised by what grows, not only inside the jar, but also in your confidence as a cook, because the real joy of fermentation isn't found only in the food you make. It's found in discovering that you've been capable of making it all along.
Let’s get cooking!
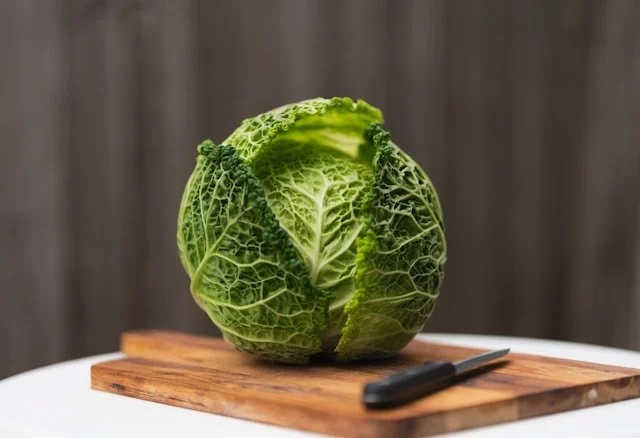
There's no better way to understand fermentation than to experience it for yourself. Start with the dilled carrots or the sauerkraut recipe that follows, then let your curiosity guide you from there. Before long, you'll discover that fermentation isn't just another recipe—it's a whole new way of looking at the food you bring into your kitchen.
Homemade Sauerkraut
Homemade Sauerkraut is one of the easiest and most rewarding fermented foods you can make. With only two ingredients—fresh cabbage and sea salt—you'll harness the power of natural lacto-fermentation to create a crisp, tangy condiment that's packed with flavor and beneficial bacteria.
This traditional recipe uses a simple 2% salt-by-weight method, ensuring consistent, successful fermentation every time. As the cabbage ferments, naturally occurring lactic acid bacteria preserve the vegetables while creating the signature sour flavor that has made sauerkraut a staple in cultures around the world for centuries.
Whether you're new to fermentation or looking to perfect your technique, this step-by-step recipe walks you through the entire process, from salting and packing the cabbage to recognizing the signs of a healthy fermentation. Enjoy your homemade sauerkraut on sandwiches, grain bowls, salads, roasted vegetables, eggs, or alongside your favorite meals for a delicious boost of flavor and gut-friendly goodness.
Homemade Sauerkraut
This weight-based method is the one most fermentation experts recommend because it scales easily whether you're fermenting half a cabbage or filling a large crock, and the 2% salt ratio consistently creates the ideal environment for beneficial lactic acid bacteria while discouraging spoilage organisms.
Ingredients
- 2 1/2 pound head of cabbage (about 1000g)
- 3-4 tsp non-iodized fine sea or canning salt (about 20g)
- 1 tsp caraway seeds (about 2g, optional)
Instructions
- Remove any damaged outer leaves from the cabbage and reserve one clean leaf for later.
- Weigh the trimmed cabbage. Multiply the weight by 0.02 (2%) to determine how much salt to use.
- Quarter, core, and thinly slice the cabbage.
- Place the cabbage in a large bowl and sprinkle the measured salt evenly over it.
- Massage the cabbage for 5–10 minutes. As you work, it will soften and release enough liquid to form its own brine.
- If using caraway seeds mix them into the cabbage.
- Pack the cabbage firmly into a clean glass jar or fermentation crock, pressing down after each handful to eliminate air pockets. Continue until all the cabbage is tightly packed.
- Pour any remaining brine from the bowl into the jar. The cabbage should be completely submerged beneath the liquid.
- Place the reserved cabbage leaf over the shredded cabbage and add a fermentation weight to keep everything below the brine.
- Cover with a fermentation lid or a loosely fitted lid to allow gases to escape. Place the jar on a plate to catch any overflow.
- Ferment at room temperature (65–75°F / 18–24°C) for 1–4 weeks. Begin tasting after one week and continue fermenting until it reaches your preferred level of tanginess.
- Once the flavor is to your liking, remove the weight, seal the jar, and refrigerate. The sauerkraut will continue to develop flavor slowly in the refrigerator and will keep for several months.
Notes
- A digital kitchen scale is your best friend. Weighing both the cabbage and salt ensures the proper salt concentration every time.
- Always keep the cabbage completely submerged beneath the brine.
- If the cabbage doesn't release enough liquid after 30 minutes, continue massaging before adding any additional brine.
- Bubbles, cloudy brine, and a pleasantly sour aroma are signs of successful fermentation.
- Kahm yeast (a thin white film) is generally harmless and can be skimmed away. Discard the batch if you see fuzzy mold or detect an unpleasant rotten odor.
Lacto-Fermented Dilled Garden Vegetables
Fermenting vegetables at home is easier than many people realize, and this Lacto-Fermented Dilled Garden Vegetables recipe is the perfect place to begin. Using nothing more than fresh vegetables, salt, water, herbs, and a little patience, you'll create crisp, tangy vegetables full of bright flavor and old-world tradition.
Unlike vinegar pickles, these vegetables develop their characteristic tang naturally as beneficial lactic acid bacteria transform the vegetables over several days. Along the way, you'll discover that fermentation is less about following strict rules and more about learning to observe, taste, and trust the process.
This recipe teaches the basic fermentation method rather than just one recipe, giving you the confidence to experiment with seasonal vegetables throughout the year. Once you understand the process, you'll discover just how enjoyable—and surprisingly simple—home fermentation can be.
So whether you're completely new to fermentation or looking for another recipe to add to your collection, this colorful vegetable ferment is flexible enough to adapt to whatever is fresh and in season. Enjoy it as a snack, on a charcuterie board, alongside sandwiches, chopped into salads, or anywhere you want to add a burst of flavor and crunch.
Lacto-Fermented Dilled Garden Vegetables
Ingredients
- 1 pound (454 g) mixed vegetables, such as carrots, cauliflower florets, radishes, green beans
- 2 cups (475 ml) filtered water
- 1 tbsp (18 g) fine sea salt (or enough to make a 2–2.5% brine)
- 2–3 cloves garlic, lightly crushed
- 2–3 sprigs fresh dill
- 1 tsp mustard seeds
- ½ tsp black peppercorns
- Optional: ¼ teaspoon red pepper flakes
Instructions
- Wash and trim the vegetables, then cut them into bite-sized pieces or sticks that will fit comfortably into a clean quart-size wide-mouth glass jar.
- In a measuring cup or bowl, dissolve the salt completely in the filtered water to make the brine.
- Place the garlic, dill, mustard seeds, peppercorns, and red pepper flakes (if using) in the bottom of the jar. Pack the prepared vegetables into the jar, leaving about 1 inch of headspace, or enough room for a fermentation weight, at the top.
- Pour the brine over the vegetables until they are completely covered. Place a fermentation weight on top to keep all of the vegetables submerged beneath the surface of the brine.
- Loosely secure the lid or use a fermentation lid with an airlock. Place the jar on a small plate or tray to catch any brine that may bubble over during fermentation. Leave the jar at room temperature (65–75°F), away from direct sunlight.
- After a day or two, you'll begin to notice small bubbles and the brine may become cloudy. These are normal signs that fermentation is underway.
- Begin tasting after 5 days. Depending on the temperature of your kitchen and your preferred level of tanginess, the vegetables may be ready in 5–10 days. Allow them to ferment longer if you prefer a more developed flavor.
- Once the vegetables taste the way you like them, remove the fermentation weight, seal the jar with a lid, and refrigerate. The cool temperature slows the fermentation, and the vegetables will keep for several months.
Notes
- Once you understand the basic method, you can adapt this recipe to the vegetables you enjoy most or whatever is in season. Try carrots and cauliflower in the spring, green beans and peppers in the summer, or turnips and radishes in the fall.
- Keep the vegetables completely submerged beneath the brine throughout fermentation. This is one of the simplest ways to ensure a successful ferment.
- Fermentation is influenced by temperature. A warmer kitchen will speed up the process, while a cooler kitchen will slow it down.
- Trust your senses. A pleasantly sour aroma, cloudy brine, and bubbles are all signs of a healthy ferment.
There you have it!
Thank you for joining me on this journey through the traditions, science, and everyday practice of fermentation. I hope these articles inspire you to discover the quiet satisfaction that comes from making something truly alive in your own kitchen.