Heat 101: Cooking Food Better Starts with Heat
It often begins the same way it always does. You’re standing at the stove, doing what you’ve done countless times before. A pan warms, oil goes in, something begins to cook. You’re following the steps, paying attention, trying to bring a meal together in a way that feels both nourishing and manageable.
And yet, something doesn’t quite land.
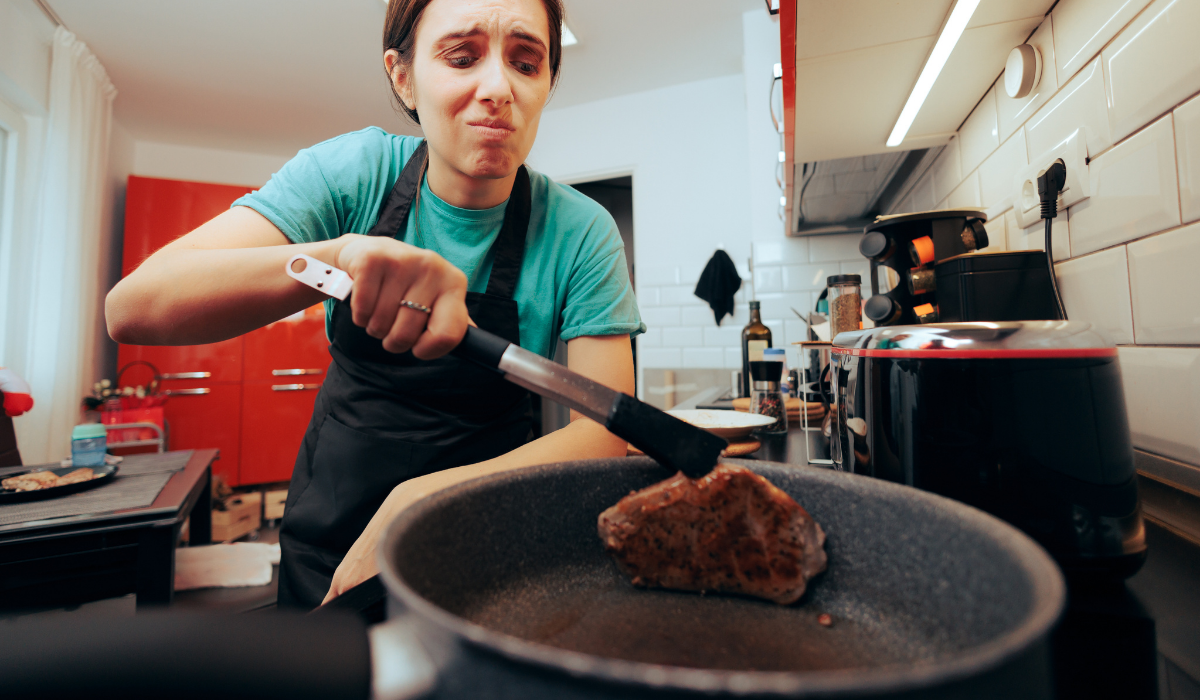
The garlic darkens too quickly, shifting from fragrant to bitter in seconds. The vegetables soften but never quite develop flavor. A piece of chicken looks beautifully golden on the outside, but when you cut into it, the inside tells a different story.
It’s easy to assume something went wrong in the recipe, or in your timing, or in your technique. But more often than not, what’s shaping the outcome isn’t what you’re cooking.
It’s the heat.
Not in a dramatic sense, and not in a way that calls attention to itself. Heat works quietly, steadily, influencing every change that happens in your pan. How quickly ingredients cook, how much moisture they retain, whether flavor develops or fades—it all traces back to how heat is being applied.
Because heat is not just a setting you choose at the beginning. It is something you work with throughout the entire process, whether you realize it or not.

And once you begin to notice it—even in a simple way—cooking starts to feel different. Less like something you’re trying to manage, and more like something you’re learning to understand.
What Heat Is Really Doing
Most recipes simplify heat into three familiar settings: low, medium, and high. While that language is convenient, it doesn’t actually explain what heat is doing or how it affects your food.
At its core, heat is energy moving into your ingredients. That sounds simple, but what it does with that energy is where cooking really begins. As heat transfers into ingredients, it starts to change their structure in very specific ways at a molecular level.
Heat softens structure. In vegetables, heat breaks down cell walls made of cellulose. This is why a raw carrot is firm and a cooked carrot becomes tender. Given time and the right level of heat, that transition feels natural. Pushed too quickly, it can become uneven—soft on the outside, resistant within. In proteins like meat or eggs, heat causes protein strands to unwind and then tighten. At lower temperatures, this happens gradually, resulting in tenderness. At higher temperatures, it happens quickly and more forcefully, which is why overcooked meat becomes firm or dry.
Moisture is also constantly being affected. Water within the food begins to move and eventually evaporates. If that happens slowly, the food retains its juiciness. If it happens too quickly, moisture is lost before the interior has had time to cook, leaving the food dry when it’s done.
And then there is flavor. One of the most important transformations in cooking is the Maillard reaction. When proteins and natural sugars are exposed to sufficient heat—generally above about 285°F—they begin to brown, creating complex flavors and aromas. This is what gives roasted vegetables their depth, a seared piece of meat its richness, or toasted bread its distinctive character. But this reaction depends on balance. Too little heat, and it doesn’t occur. Too much, and it moves too quickly into burning.
What complicates this is that heat never works alone. It is always interacting with time.
A higher heat applied quickly will push food to change rapidly, often affecting the outside before the inside has time to catch up. A lower heat, given more time, allows those changes to happen gradually and more evenly.
This relationship between heat and time is what determines whether food becomes crisp or tender, deeply flavored or underdeveloped, evenly cooked or inconsistent.
When you begin to see heat this way—not as a setting, but as an active force—you start to understand why small adjustments can have such a large impact.
What Heat Actually Looks Like (and Feels Like) in the Pan
When you begin to watch heat instead of simply setting the dial, you start to see clear patterns as you recognize how heat appears and behaves as you cook.
At lower heat, the pan sits with very little movement, ingredients slowly softening, perhaps releasing a bit of moisture. This is when heat is quiet and restrained. There may be almost no sound at all. This kind of heat can feel uncertain at first, as though nothing is happening, but it is essential for foods that need a gentle approach. This is where delicate cooking happens. Eggs, for example, will become tender and cohesive at lower temperatures but can quickly become rubbery if pushed too hard. Sauces behave in a similar way, where too much heat causes separation rather than smoothness.
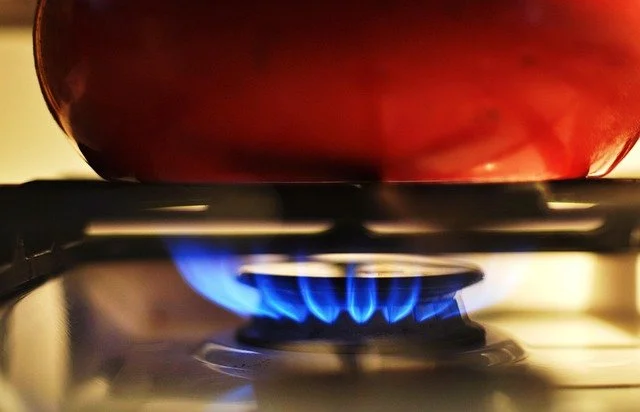
At moderate heat, the pan becomes more active, it feels alive but controlled. Oil begins to loosen and move easily. When it reaches the right temperature, it develops a subtle shimmer, almost like faint ripples moving across the surface. This is your signal that the pan is ready. When food meets the pan at this stage, you hear a steady, controlled sizzle. Not aggressive, not sharp—just consistent. This indicates that moisture is evaporating at a balanced rate, allowing the surface to begin browning while the interior cooks. Ingredients begin to cook with intention rather than urgency. This is where much of everyday cooking happens, and where many people benefit from spending more time. Vegetables soften while still maintaining structure. Proteins cook through without becoming tough. Flavors begin to build gradually.
At the higher end, heat becomes more assertive and the reaction is immediate and forceful. The oil may begin to smoke slightly, and the sound becomes loud and sharp. Food reacts as soon as it hits the pan, creating sound, movement, and rapid change. This is useful when you want to develop a sear or bring water to a boil, but it requires attention. Without adjustment, food can move past the point of development and into burning very quickly.
Learning to recognize these expressions of heat is far more useful than relying on fixed settings. It allows you to respond to what’s actually happening, rather than what you expect to happen.
Your Stovetop: An Overlooked Tool
Before you even begin adjusting heat, your stovetop has already influenced the outcome because you have a choice of burners to cook on. Burners vary in size and power, often measured in BTUs. A smaller burner may produce around 5,000 to 7,000 BTUs, while a larger one can exceed 15,000. That difference is substantial and matters more than most people realize.
A large burner set to medium can still deliver a significant amount of heat—sometimes more than is needed for delicate cooking. A smaller burner on the same setting may feel calm and steady, giving you more room to work without things getting out of hand.
This is often why the same dish can turn out differently from one attempt to the next, even when you think you’re doing everything the same way. The choice of burner changes the baseline.
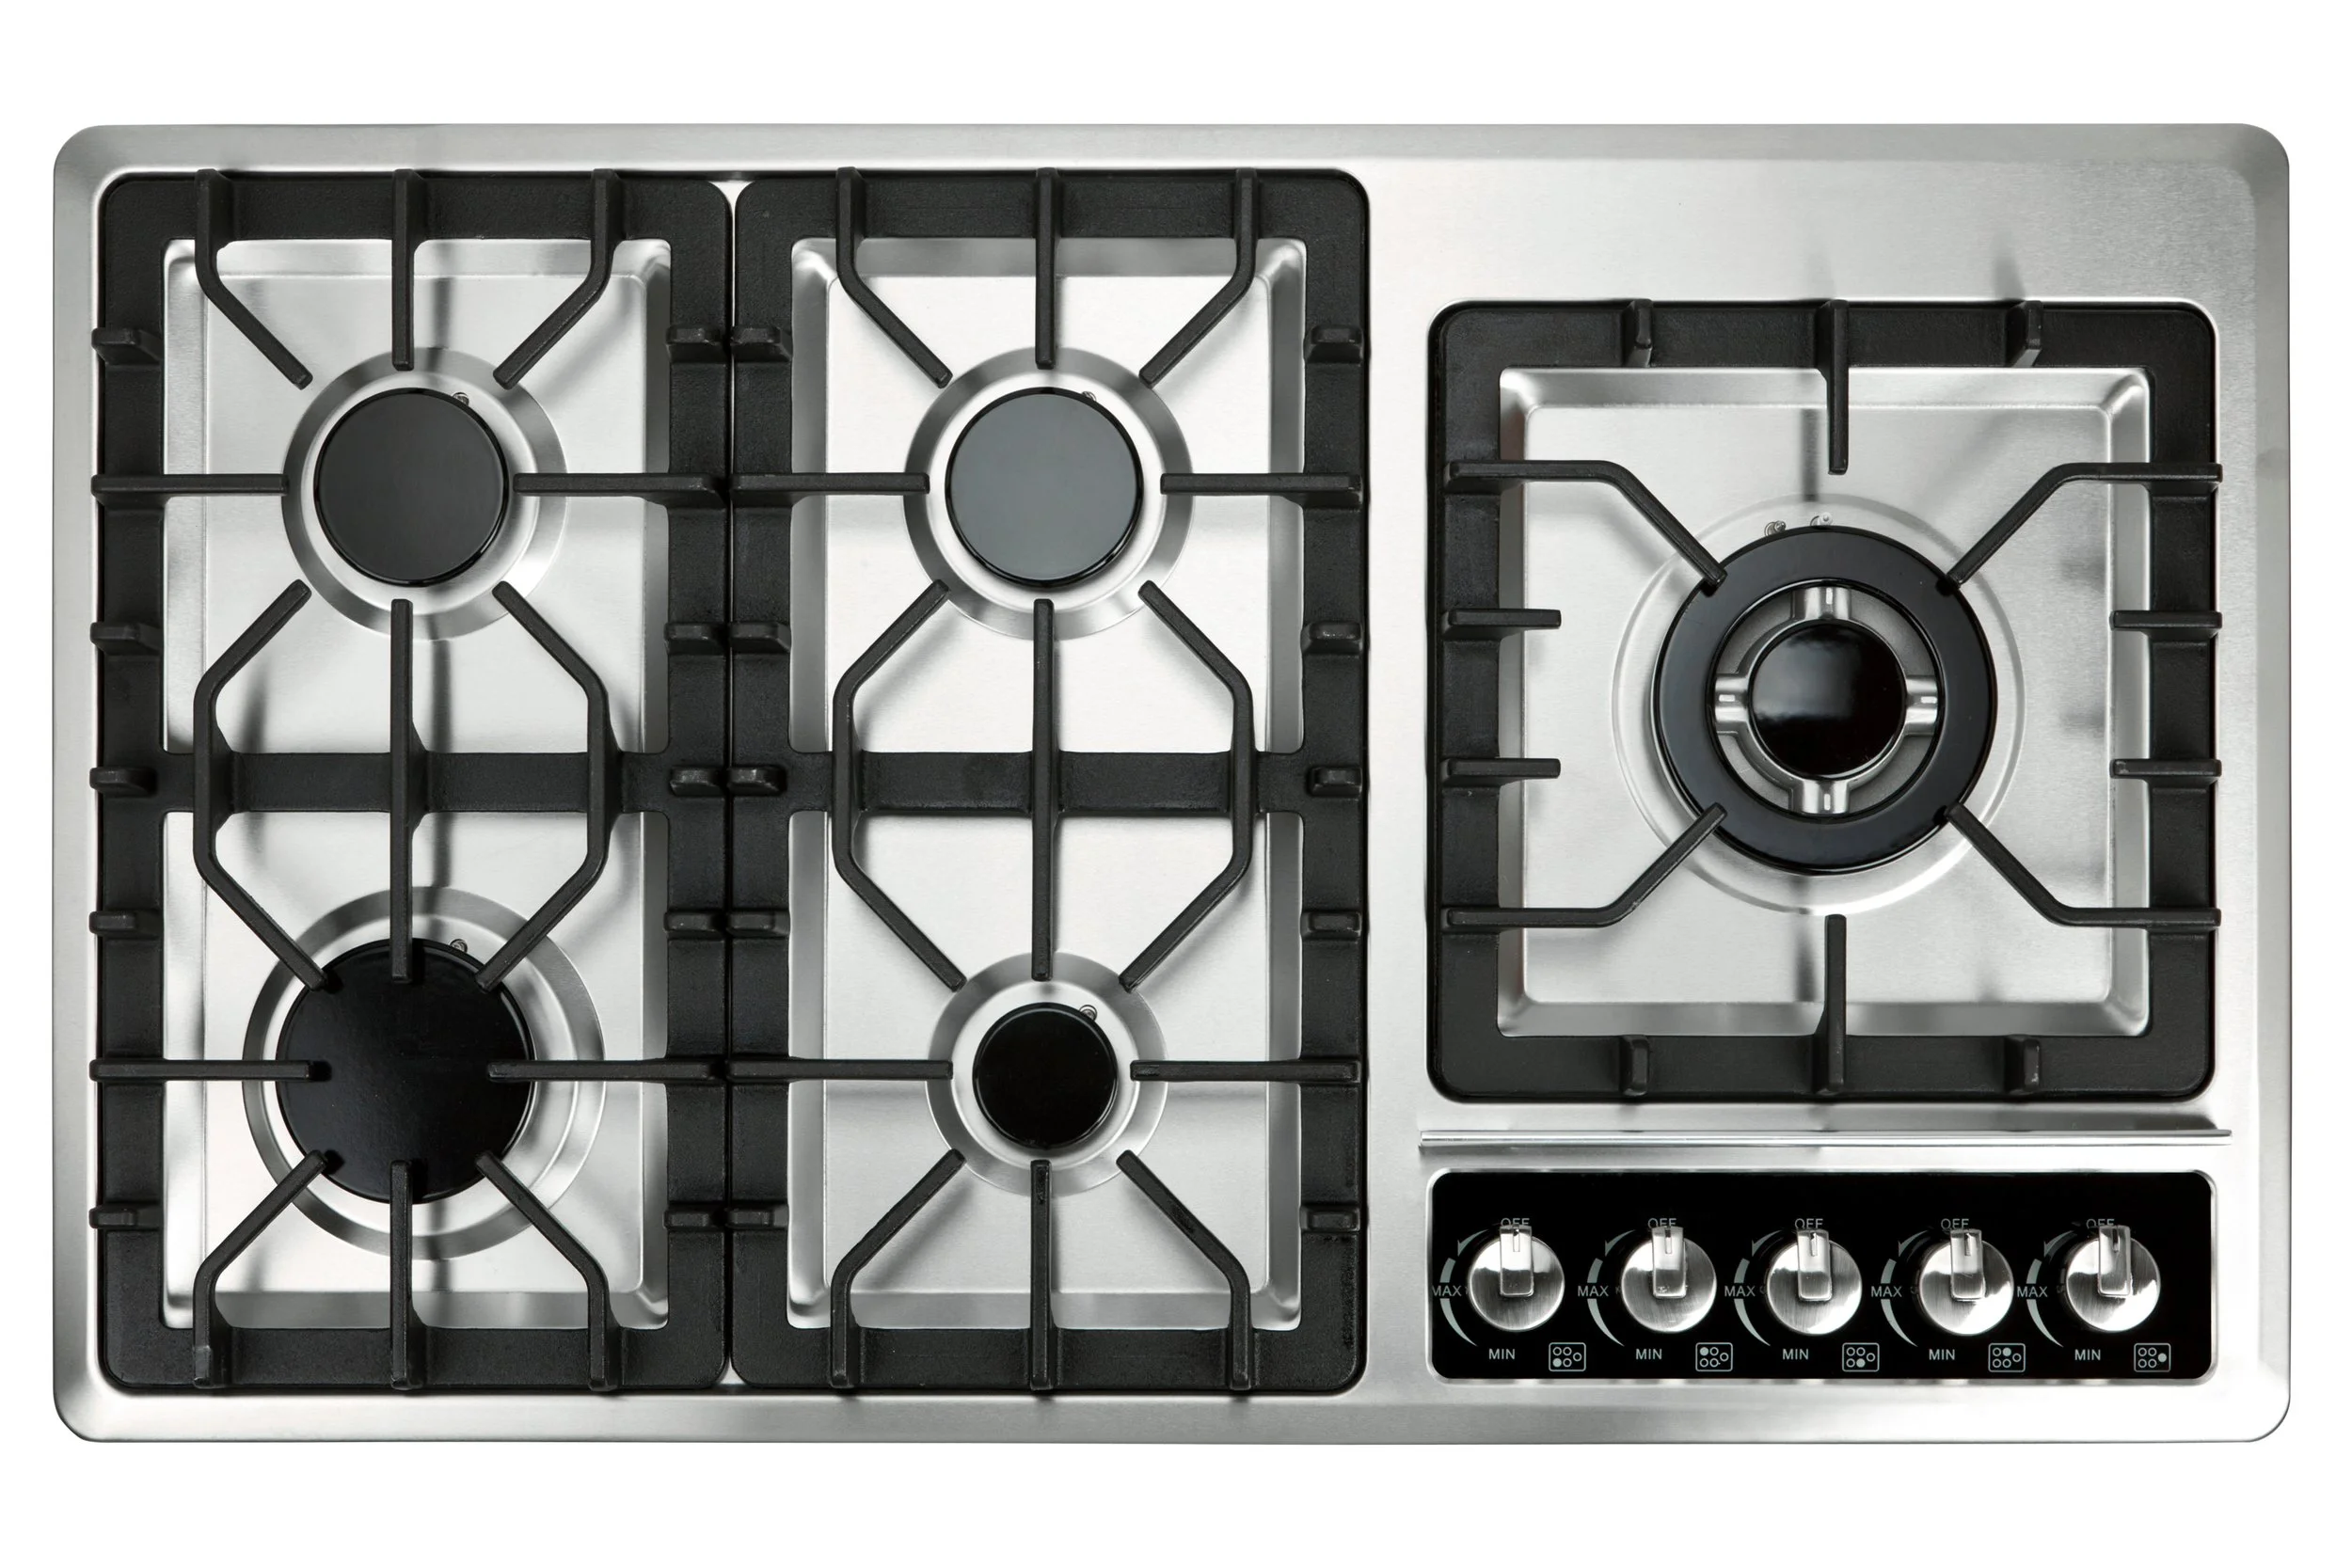
Understanding Burner Size and “Personality”
A stovetop may look like four identical spots to put a pan, but each burner actually has its own “personality.” That shapes how your food cooks just as much as whatever number you turn the knob to. Using them well makes heat much easier to control.
The smallest burner gives gentle, focused heat that works well for tasks that need control more than speed: keeping a sauce just barely simmering, slowly softening beans, warming leftovers without drying them out, or melting something delicate like chocolate. On this burner, low really can be low, and medium often gives a calm, steady simmer instead of an aggressive boil.
The medium burner is usually the workhorse. It has enough strength to bring a medium pot to a boil, but it can also be turned down easily for more relaxed cooking. This is where most day-to-day cooking is happiest: sautéing vegetables, cooking grains, making pancakes, frying eggs. On this burner, the heat settings on the dial behave in a way that is easier to predict and repeat.
The largest burner is the powerhouse that’s designed to move a lot of heat and to do it fast. Which is exactly what you want when boiling a big pot of water for pasta, preheating a heavy skillet for a serious sear, or cooking in a large pan packed with food. Even at what looks like a modest setting, the sheer size and output make this burner behave like a much higher heat.
The final touch is matching pan size to burner size—small pan on small burner, large pan on large burner—so that everything else in cooking becomes easier. The heat distributes more evenly, there are fewer surprise hot spots, and the numbers on the dial start to mean something consistent. That sets the stage for understanding what “low,” “medium,” and “high” actually feel like in the pan.
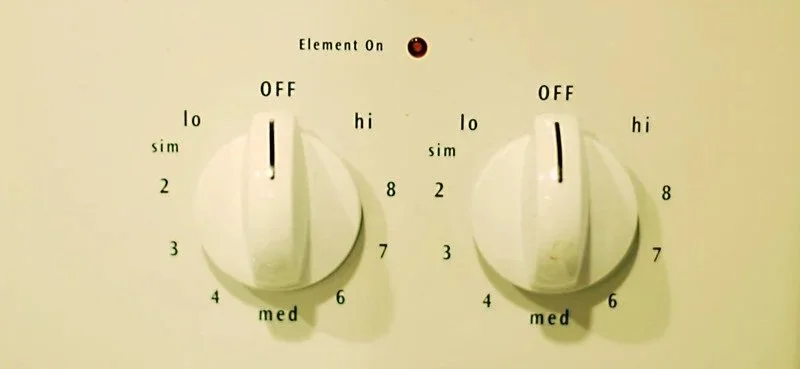
Decoding Low, Medium, and High Heat
Most recipes lean on the language of low, medium, and high heat, but they rarely explain what those words really mean in practice. The numbers on a stove dial can vary widely from one appliance to another, so it helps to think of these terms less as fixed settings and more as “zones” confirmed by what is happening in the pan.
Low heat is the gentle end of the spectrum. On many stoves, it sits in the lower third of the dial. At this level, liquids barely move, sauces tremble instead of boiling, and eggs set without browning. It’s the setting for softening, melting, and keeping food warm. It gives you time and control.
Medium heat is where most home cooking happens. It usually lives somewhere in the middle of the dial, but its real signature is in the look and sound of the food. Oil begins to shimmer and move freely when the pan is tilted, food placed in the pan responds with a steady sizzle, and browning happens gradually rather than in a rush. Vegetables soften and turn golden, pancakes cook through with a light crust, and proteins like tofu or chicken can cook all the way to the center without burning on the outside. Medium heat is about balance: it is hot enough to build flavor and texture, but not so intense that things go from pale to burned in a heartbeat.
High heat is strong and fast. It occupies the upper range of the dial and is best used when there is a clear reason. A pan given time to preheat on high will cause oil to ripple almost instantly, and food dropped into it will crackle loudly. Water will surge into a rolling boil in short order. High heat is ideal for searing, stir-frying in small batches, and bringing large pots of liquid to a boil quickly. It is not meant for long, unattended cooking. Left alone, a pan on high will scorch oil and burn food fast.
As you start to pair the right burner with these heat zones, they begin to behave much more predictably. Low on a small burner becomes a reliable simmer. Medium on a medium burner delivers that steady sizzle most recipes are written for. High on a large burner becomes a powerful tool for searing or boiling, rather than a guaranteed way to fill the kitchen with smoke.
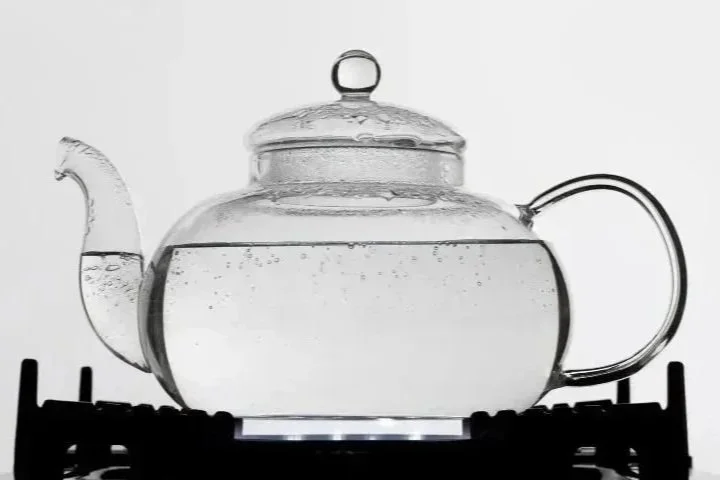
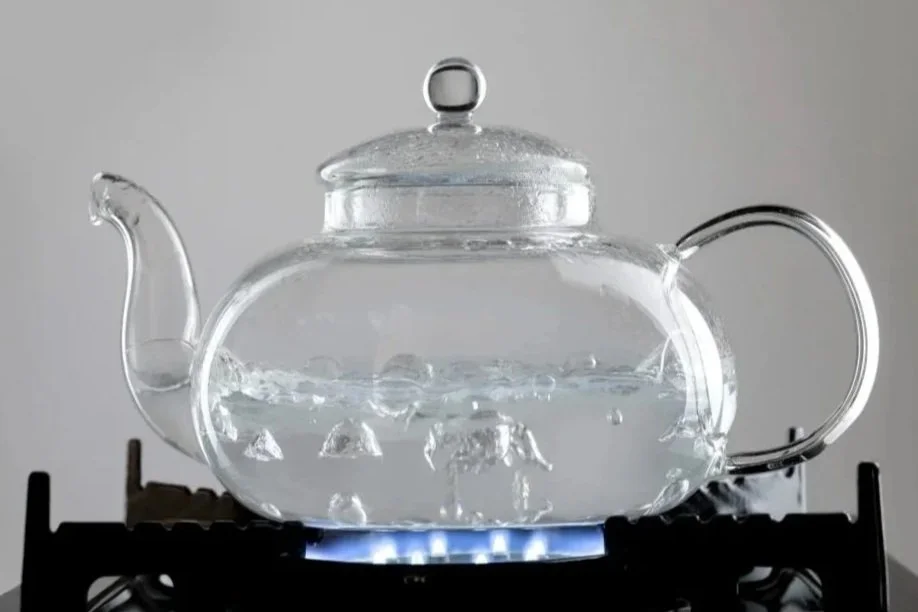
Water as a Guide: Seeing Heat in Its Purest Form
One of the clearest ways to understand heat is to watch what it does to water.
At lower temperatures, water barely moves. This is the range used for poaching. If you were to crack an egg into water at this stage (typically 140F - 180F or 60C - 82C), you would see very gentle movement —perhaps a slight shifting, but no bubbling. The egg cooks softly, holding its shape without agitation. This is what gentle heat looks like.
As heat increases and the temperature rises, small bubbles begin to form and drift slowly to the surface. This is a simmer, usually around 185F - 205F or 82C - 96C. The movement is steady but controlled. This level of heat is ideal for soups, sauces, and grains. There is enough heat to cook steadily, but not so much that ingredients break apart or toughen.
At a full boil (212F or 100C), water becomes vigorous and rolling. Large bubbles rise rapidly and continuously. This is high heat in its clearest form for when you need energy and speed, but it’s not suitable for everything. This is useful for cooking pasta or blanching vegetables, where high heat is needed to cook quickly.
These stages of water offer a clear visual and physical reference for what different levels of heat actually do and they mirror what’s happening in your pan. Gentle heat, moderate heat, high heat—each with a distinct purpose and effect.
Matching Burner and Heat to Common Cooking Methods
Once burner personality and heat zones are clear, you can begin to choose combinations that match what you are trying to cook. The same ingredients can turn out completely differently depending on whether you use gentle heat on a small burner or intense heat on a large one.
Different cooking methods simply string together smart choices about burner and heat. For a basic sauté, a medium burner on medium heat with a pan that fits gives even, steady browning. Eggs stay tender when they sit on a small or medium burner over low to medium-low heat, so they have time to set without turning rubbery. Pan-searing meat, tofu, or tempeh often starts with a large burner on high to preheat the pan and build a crust, then continues on medium heat so the inside can cook gently. Soups and stews usually begin on high heat to reach a boil, then move to low heat on a smaller burner for a relaxed simmer. Stir-fries are the exception that really use high heat on a large burner from start to finish, relying on constant movement and small pieces of food to avoid burning.
At the same time, your choices here affect not just taste and texture, but also nutrition. Extremely high heat applied for long periods can damage delicate oils and degrade some vitamins. Using moderate heat on the appropriate burner often strikes a better balance between proper cooking and nutrient retention, especially for vegetables and healthy fats.
All of these decisions become even more precise when you factor in the type of pan you are using and how much food you put in it.
Why Things Go Off Track (and What It Looks Like When They Don’t)
Imagine this.
It’s the end of the day. You’re hungry, maybe a little tired, and you want to get something on the table without too much effort.
You turn on the stove and set the pan over a larger burner—it’s the one you usually use. The dial goes to medium-high, just to get things moving.
Oil goes in. It heats quickly—faster than you realize. You add garlic, and within seconds it begins to darken. You stir, trying to keep up, but now it’s already crossed that line into bitterness. You lower the heat, but the pan is still hot. You add vegetables, hoping to recover, but they release moisture immediately. Instead of browning, they begin to steam.
Now you’re adjusting, reacting, trying to bring things back into balance.
Nothing has gone terribly wrong, but nothing feels quite right either. This is how heat often works when it’s not being noticed early enough. It builds quickly, especially on a larger burner, and by the time you respond, it’s already ahead of you.
Now imagine the same moment approached differently.
The pan goes on the stove, but this time on a smaller or more moderate burner. The heat is set to medium. You give it a moment—not long, just a few moments really—to warm steadily.
Oil goes in and you watch it. At first it sits still, then begins to move more freely and spread out in the pan. When it shimmers, you know it’s ready so the garlic goes in, and instead of racing, it softens and releases its aroma gradually. You have time to notice it, to stir it, to decide when to move forward. Then the vegetables follow. You hear a steady sizzle that’s neither loud nor aggressive. They begin to cook, releasing moisture, but also taking on color as that moisture evaporates.
You’re not rushing or reacting - you’re working with what’s happening. This is what it looks like when heat is used mindfully.
The difference is not dramatic. The shift comes not from doing more, but from noticing sooner. Starting with the right burner. Letting the pan heat at a moderate pace. Watching the oil, listening for that first gentle sizzle.
Small moments of attention that change the entire outcome.
Learning to Read the Pan
Once you begin to slow down just enough to notice what’s happening, the pan starts to give you information in very clear ways. Your senses give you constant feedback, but it helps to know exactly what to look for.
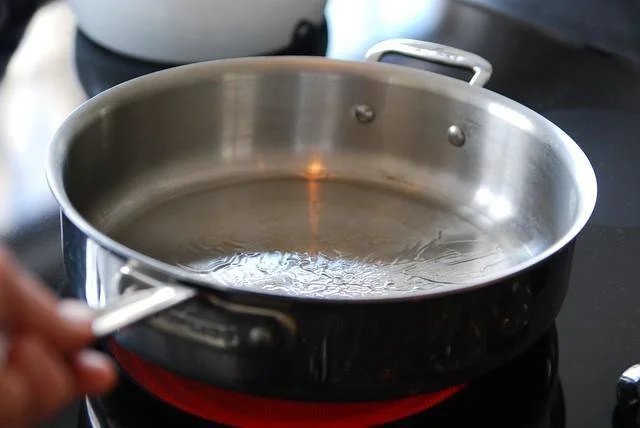
When oil is first added to a pan, it sits thick and still. As it heats, it becomes thinner and begins to move more easily. When you tilt the pan, it flows quickly and evenly. At a certain point, you’ll notice a shimmer—a subtle, almost wavy appearance on the surface. This is your indication that the oil is hot enough for cooking.
If you go past this point, the oil may begin to smoke. This is a sign it’s breaking down and getting too hot for most cooking purposes.
Sound is equally informative. A steady, moderate sizzle sounds controlled, almost rhythmic. It suggests moisture is evaporating at a balanced rate, allowing food to cook and brown.
A loud, sharp crackling sound often means the heat is too high or there is excess moisture hitting a very hot surface. This can lead to uneven cooking. If there is very little sound, the heat may be too low for the desired result.
Smell provides another layer. When food is cooking well, the aroma deepens gradually—savory, warm, inviting. When it begins to burn, the smell becomes sharp and acrid, a clear signal to adjust immediately.
These cues are always present. The shift comes in learning to notice them and trust what they’re telling you.
How Pan Type and Food Quantity Change the Game
Even when burner choice and heat level are spot on, the pan itself and the amount of food in it can nudge the results in very different directions. This is one reason “medium heat” never feels exactly the same from one situation to the next.
A heavy pan, such as cast iron or thick stainless steel, takes longer to heat, but once hot it holds that heat well. This is a great advantage for searing because the pan does not cool off much when cold food is added. It does mean, however, that it can become very hot and stay that way, so dialing back the heat once the pan is preheated often gives better control. A lighter pan, including many nonstick options, heats quickly but loses heat more easily. With a light pan on a small burner, a pan that looked hot enough one moment can cool down once you add a lot of food, turning a planned sauté into an unintended steam.
The amount of food in the pan matters just as much. When the pan is crowded—say, packed with mushrooms or piled high with vegetables—the food releases moisture faster than it can evaporate. Instead of browning, everything simmers in its own juices. The surface temperature of the food never gets high enough to caramelize properly. Cooking in two batches or using a wider pan on an appropriately powerful burner helps the excess moisture escape, allowing those golden edges to form.
The opposite problem appears when there is only a small amount of food in a very large pan over high heat. There is so much hot surface and so little food that browning happens extremely fast, sometimes crossing the line into burning before the inside is ready. In this case, choosing a smaller pan, lowering the heat, or both can slow things down to a more manageable pace.
Even the choice of cooking fat interacts with heat. Butter and many unrefined oils begin to brown and then burn at lower temperatures than refined oils. Using them over strong heat on a large burner makes scorching more likely. Combining butter with a more heat-tolerant oil, or keeping the heat in the low to medium range, protects their flavor and avoids bitter, burnt notes.
When you start to see burner size, heat setting, pan type, and food quantity as pieces of the same puzzle, cooking becomes far more predictable.
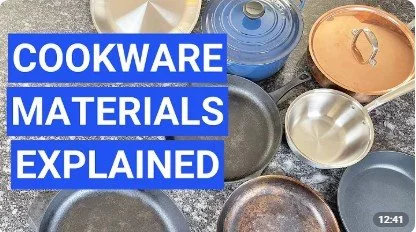
Here’s a great video explaining the pros and cons of the best cookware materials: Cookware Materials 101: A Beginner’s Guide to Picking the Right Pans
Adjusting as You Go
One of the most practical skills you can develop is the willingness to adjust heat throughout the cooking process.
If something begins to cook too quickly, lowering the heat slightly can bring it back into balance. If progress feels slow, a small increase can help move things along. If the pan becomes too hot, removing it from the heat for a brief moment can reset the temperature.
These adjustments do not interrupt cooking. They are an essential part of it. Over time, they become less of a decision and more of a response—something you do naturally as you observe what’s happening.
This is what it means to begin to “feel” cooking over time.
You start to recognize the pace at which something should be happening. You notice when color is developing too quickly, when sound becomes too intense, when moisture isn’t evaporating as it should.
And instead of reacting after the fact, you begin to adjust as it’s happening.
A Different Relationship with Cooking
As you begin to understand heat more clearly, something shifts.
Cooking becomes less about managing a process and more about participating in it. You begin to see how small changes influence the outcome. You become more comfortable making adjustments, trusting that you can respond to what’s happening in front of you.
It doesn’t make cooking perfect. But it makes it steadier. More intuitive.
And ultimately, more your own.
A Simple Place to Begin
The next time you cook, let it be an opportunity to experiment, even in a small way.
Choose something simple. Watch how the pan heats. Notice how the oil changes. Listen for the moment when food begins to respond. Notice how quickly it changes, how it sounds, how it looks as it cooks.
Try using a different burner than you normally would. Observe how the heat feels different, even before you adjust the dial. Adjust it once or twice, just to see what happens.
There is no need to get it exactly right.
Just a willingness to observe, respond, and learn from what you notice.
Because that is where confidence in the kitchen begins—not in doing more, but in understanding more.
Let’s get cooking!
Let’s bring this into your next meal. As you begin cooking, take a moment to notice your heat from the start. Choose your burner with intention, watch how the pan warms, and pay attention to how the food responds in those first few minutes. That’s where most of the story is written.
Lentil, Kale, and Sausage Soup
There are certain recipes that don’t rely on novelty or complexity to hold your attention. They ask for something quieter—just a willingness to stay with the process and notice how things change as they cook. This Lentil, Kale, and Sausage Soup is one of those recipes.
Nothing about it is complicated, but each step matters. The sausage is browned first, not just to cook it through, but to create a base that the rest of the ingredients can build on. The vegetables are allowed to soften fully, rather than being rushed, so their flavor becomes part of the broth rather than sitting on top of it. As the lentils simmer, they begin to thicken the soup naturally, changing both the texture and the way the flavors come together.
There’s a point, somewhere in the middle of cooking, where the individual components stop feeling separate. The broth deepens, the lentils soften, and the pace of the pot settles into something steady and consistent. By the time the kale is added, the soup has already found its direction. It only needs a few more minutes to soften and integrate.
What you end up with is something cohesive and balanced—flavor built gradually, texture that feels intentional, and a result that reflects how the heat was managed along the way. It’s a reminder that good cooking doesn’t always come from doing more, but from giving simple ingredients the time and attention they need to become something complete.
Lentil, Kale, and Sausage Soup
Ingredients
- 1 tbsp olive oil
- 10–12 oz sausage (Italian-style pork sausage or plant-based sausage), casing removed if needed
- 1 cup diced onion
- 1 cup diced carrot
- 1 cup diced celery
- 3 cloves garlic, minced
- 1 tsp dried thyme (or 2 tsp fresh thyme)
- 1/2 tsp smoked paprika (optional, but adds depth)
- 1 cup dried green or brown lentils, rinsed
- 6 cups vegetable or chicken broth
- 1 bay leaf
- 1 bunch kale, stems removed and leaves chopped (about 4–5 cups loosely packed)
- Salt and black pepper, to taste
- 1–2 tsp lemon juice (to finish)
Instructions
- Start by placing a heavy-bottomed pot over a medium burner and letting it warm for a minute or two. Add the olive oil, followed by the sausage. Break it apart with a spoon and let it cook slowly at first, then more actively as the heat builds. You’re looking for browning here—those deeper, caramelized bits that will later dissolve into the broth and build flavor.
- Once the sausage has developed color and rendered some fat, add the onion, carrots, and celery. Stir gently and let them cook in that same fat until the onions begin to soften and turn translucent.
- Add the garlic, thyme, and smoked paprika, stirring just until fragrant - about 1 minute.
- Pour in the rinsed lentils, broth, and bay leaf. Stir everything together and bring the pot to a gentle boil over medium-high heat. Once it reaches that point, reduce the heat to a low simmer. You should see small, steady bubbles breaking the surface—not a rolling boil, but a calm, consistent movement.
- Let the soup simmer uncovered for about 25–30 minutes, or until the lentils are tender but not falling apart. During this time, the flavors will deepen and the broth will thicken slightly as the lentils break down just enough to give body.
- Once the lentils are cooked, add the chopped kale. Stir it in and let it simmer for another 5–7 minutes, just until the leaves soften and turn a deeper green. The kale should hold its shape but lose its raw toughness, blending into the soup without disappearing completely.
- Taste and adjust with salt and black pepper. Finish with a small splash of lemon juice to lift the richness and bring the flavors into focus.
Blueberry Tofu Muffins
There’s something quietly satisfying about a muffin that feels both nourishing and indulgent—and these Blueberry Tofu Muffins strike that balance beautifully.
Silken tofu melts seamlessly into the batter, creating a soft, tender crumb you might not expect. It’s one of those ingredients that works behind the scenes, adding structure and richness without calling attention to itself. The result is a muffin that’s moist, delicate, and deeply satisfying.
Bright lemon zest lifts the flavor just enough, while a hint of cardamom adds warmth and a subtle complexity that lingers in the background. Bursts of juicy blueberries bring sweetness and contrast, and a scattering of pistachios adds a gentle crunch and a touch of earthiness.
These are the kind of muffins you can make on a quiet morning or batch for the week ahead—equally at home with a cup of tea, tucked into a lunch, or enjoyed as a simple, not-too-sweet treat.

Blueberry Tofu Muffins
Ingredients
- 1 cup (8 oz) silken tofu
- 2 large eggs
- 1/3 cup maple syrup or honey
- 1/4 cup avocado oil or melted butter
- 1 tsp vanilla extract
- 1 tbsp lemon zest
- ¾ tsp ground cardamom
- 1 3/4 cups gluten-free all-purpose flour
- 2 tsp baking powder
- 1/2 tsp baking soda
- 1/2 tsp salt
- 1 1/2 cups blueberries, fresh or frozen
- 1 tbsp gluten-free flour, for tossing blueberries
- 1/2 cup chopped pistachios, plus a little extra for topping
Instructions
- Heat oven to 375°F and line or grease a 12-cup muffin tin.
- Blend the tofu, eggs, maple syrup, oil, vanilla, and lemon zest in the blender until smooth.
- In a large bowl, whisk together the flour, baking powder, baking soda, salt, and cardamom.
- Stir the wet ingredients into the dry ingredients just until combined.
- Toss the blueberries with 1 tablespoon flour, then fold them in along with the pistachios.
- Divide the batter among the muffin cups and top with a few extra pistachios.
- Bake for 18 to 22 minutes, until lightly golden and set in the center.
- Cool for 5 minutes in the pan, then move to a rack.
Notes
- Use 2 tablespoons maple syrup plus 1 very ripe mashed banana if you want natural sweetness with less added sugar.
There you have it!
Heat is always present, shaping what happens whether we notice it or not. When you begin to work with it—rather than around it—you bring a quiet kind of confidence into the kitchen that stays with you long after the meal is done.